• Thanks for visiting The Penturners Forum today.

    There are many features and resources that currently you are unable to see or access, either because you're not yet registered, or if you're already registered, because you're not logged in.

    To gain full access to the forum, please log in or register now. Registration is completely free, it only takes a few seconds, and you can join our well established community of like-minded pen makers.

Adding rings

Vanagas Pen

Apprentice Member
Joined
Sep 20, 2024
Posts
7
Location
Turkiye
First Name
Burak
Hey all. I have a question again :)

Is there any content about adding rings (two or three) to the end of the cap? I don't understand to put it to a thinner space from the acrylic part...
 

Attachments

  • Screenshot_20241026_085443_Chrome.jpg
    Screenshot_20241026_085443_Chrome.jpg
    339 KB · Views: 20

alan morrison

Fellow
Joined
Feb 26, 2019
Posts
2,753
Location
Co. Down N Ireland
First Name
Alan
If you mean that you want to incorporate aluminium rings on an already turned blank ( not on a tube) then I would do the following just being more careful if cutting on a table saw.

If starting with a drilled blank, cut where you want the ring placement using a stop block to keep equidistant.
Make sure you mark the blank so the pieces can be replaced in the same order. Build the blank onto the tube, adding the pre-drilled and scuffed aluminium, using 2-part epoxy.
Hope that helps.
All the best.
 

Paul-H

Full Member
Joined
Mar 5, 2023
Posts
113
Location
Kent
First Name
Paul
Another way is to do it the way many commercial pen companies did it.

That is to turn locating rings into the cap, preferably before is drilled and tapped

Then place your chosen slightly oversize metal rings into position, then using a swaiging tool, a collet chuck will do, then swaige the rings into the turned groves.

You do have to be careful not to damage the rings exposed surface, especially if using a collet chuck, wrapping the rings with thin metal sheet will help.

It sounds easier than it is to do though.
 

Vanagas Pen

Apprentice Member
Joined
Sep 20, 2024
Posts
7
Location
Turkiye
First Name
Burak
Eğer önceden tornalanmış bir boşluğa (bir boruya değil) alüminyum halkalar eklemek istiyorsanız, o zaman bir masa testeresinde keserken daha dikkatli olmak dışında aşağıdakileri yapardım.

Delinmiş bir boşlukla başlıyorsanız, eşit mesafeyi korumak için bir durdurma bloğu kullanarak halkanın yerleştirilmesini istediğiniz yeri kesin.
Parçaların aynı sırayla değiştirilebilmesi için boşluğu işaretlediğinizden emin olun. Boşluğu, önceden delinmiş ve aşındırılmış alüminyumu ekleyerek, 2 parçalı epoksi kullanarak borunun üzerine yerleştirin.
Umarım yardımcı olur.
Herşey gönlünce olsun.
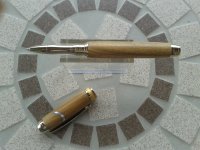
This way seems hard. I think this works for only one ring (thin or not) but when I want to add 2 rings or more, its getting harder to do it. I think I will just make one ring about 5 mm wide.. for adding this, I will shave my resin from 16 mm to 14 mm... then I will add the chrome ring which is 16/14. Then I will turn my resin from 18 to 16. Being same with the ring, and polish... I think this will work for one ring.
 

Pierre

Fellow
Joined
Sep 2, 2015
Posts
1,043
Location
Southern Central France
First Name
Pierre
Merhaba Burak Nasilsin. If you want to put aluminium rings into wood, it is better to make the blank with the aluminium already glued into the blank. then because it is soft you can drill it like wood and turn it like wood (although you may need to sharpen a bit more often) . I use good superglue on aluminium roughened to take the glue and I leave it to cure for 48 hours, then I can turn it. as in the lid below.


20160820_113946.jpg
 

colinandrew

Full Member
Joined
Feb 4, 2025
Posts
34
Location
western australia
First Name
colin
Do you mean incorporating rings eg. aluminium into the blank???
Hi from down under, thanks for setting up this forum. I'll have to wait for my younger, computer-savvy housemate to show me how to use this properly. I saw one of your pens on Pinterest, and googled you & ended up here :)
This is the 1 I love & would like to try with your blessing & advice please? Is it like 1 of my early pens, & then you keep going aka Celtic knot? I'll keep trying to navigate my way around here too.
 

Attachments

  • Screenshot 2025-02-05 131622.png
    Screenshot 2025-02-05 131622.png
    1.9 MB · Views: 11
  • Screenshot 2025-02-05 132431 11.png
    Screenshot 2025-02-05 132431 11.png
    261.5 KB · Views: 11

Pierre

Fellow
Joined
Sep 2, 2015
Posts
1,043
Location
Southern Central France
First Name
Pierre
Hi Colin and welcome to the forum. The pictures that you show are indeed formed like a standard Celtic knot, all that changes is the angle of the cut and the type of wood that is inserted into the cut. In the case of your first picture it looks like there are 3 layers (all glued together)inserted into the main blank prior to turning at a more oblique angle to the standard 45 degrees. The essential bits are that each piece is inserted at the same angle and the second is the precision of drilling the hole into the blank.

enjoy your surfing around the forum you will find that everyone has advice to offer. And they enjoy the discussions.
 

colinandrew

Full Member
Joined
Feb 4, 2025
Posts
34
Location
western australia
First Name
colin
Hi Colin and welcome to the forum. The pictures that you show are indeed formed like a standard Celtic knot, all that changes is the angle of the cut and the type of wood that is inserted into the cut. In the case of your first picture it looks like there are 3 layers (all glued together)inserted into the main blank prior to turning at a more oblique angle to the standard 45 degrees. The essential bits are that each piece is inserted at the same angle and the second is the precision of drilling the hole into the blank.

enjoy your surfing around the forum you will find that everyone has advice to offer. And they enjoy the discussions.
Thanks for that Pierre, I thought I was replying to Alan, as the 1st pic is his pen. The 2nd pic is one I made at the beginning of the craft & is only 'cheeks' on 2 sides cut with a hole saw .
I thought Alans may be a curved cut, Celtic knot.
 

alan morrison

Fellow
Joined
Feb 26, 2019
Posts
2,753
Location
Co. Down N Ireland
First Name
Alan
I saw one of your pens on Pinterest, and googled you & ended up here :)
This is the 1 I love & would like to try with your blessing & advice please? Is it like 1 of my early pens, & then you keep going aka Celtic knot? I'll keep trying to navigate my way around here too.
Indeed. Colin, the first pen is mine.
It is cut on a pillar drill using a jig and a hole saw.
The kerf is filled with 3 layers of veneer to the same thickness.
Next time I make one I will photograph the process for you.
 

ValleyBoy

Graduate Member
Joined
Jul 9, 2019
Posts
822
Location
Cardiff
First Name
Ash
In answering the original question there are 3 ways you can add rings to a cap on a pen. I’ll assume the rings are metal and the main material is acrylic in my explanation to distinguish them from each other :
1) create a tenon on the end of the cap and make the metal rings to fit. If you want to add more than one ring then you need to make spacer rings from acrylic and stack them on top of each other.
2) create an insert for the cap (think inverted T shape). The narrow part slides up into the cap. The rings/spacers are made to fit over the narrow part of the insert.
3) as has already been mentioned use the swaiging technique by squeezing the rings into pre-made recesses using a collet. I believe your photo is of a pen that is made using this approach.

Cheers
Ash


Write your reply...
Top