-
Thanks for visiting The Penturners Forum today.
There are many features and resources that currently you are unable to see or access, either because you're not yet registered, or if you're already registered, because you're not logged in.
To gain full access to the forum, please log in or register now. Registration is completely free, it only takes a few seconds, and you can join our well established community of like-minded pen makers.
You are using an out of date browser. It may not display this or other websites correctly.
You should upgrade or use an alternative browser.
You should upgrade or use an alternative browser.
Grasbylee
Full Member
Wish I had a lathe that was slow enough to turn threads - that looks great [emoji1303]
Sent from my iPhone using Tapatalk
Sent from my iPhone using Tapatalk
Wish I had a lathe that was slow enough to turn threads - that looks great [emoji1303]
Sent from my iPhone using Tapatalk
Hi Lee, Im just using a standard wood lathe - threads are cut by manually turning the headstock
Excellent job Ian, well done.
different with the contrasting MOP.
different with the contrasting MOP.
Grasbylee
Full Member
Hi Lee, Im just using a standard wood lathe - threads are cut by manually turning the headstock
I might try that - need to get some thread cutting gear at some point and give it a go
Sent from my iPhone using Tapatalk
wm460
Grand Master
- Joined
- Mar 16, 2013
- Posts
- 23,113
- First Name
- Mark
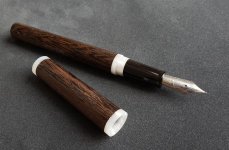
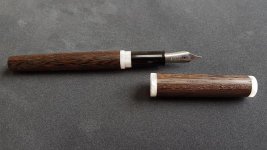
Great looking pen, well done.


Terry Q
Fellow
I have always liked Wenge. Your pen is lovely.
Ian, it seems it is going to be hard to stop you kitlessing from now on!
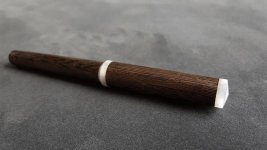
Congrats for the centre band, not that easy indeed, but it was worth it, great look!. Two remarks, only a matter of taste: I would have liked a touch of white at the end of the barrel. And about the surface of the wenge, it could have deserved a little pore-filling operation.
You are ready for adding a clip now.
Lee, you don't need any gears, you just turn the headstock by hand ,and the tap guides the tailstock advance.I might try that - need to get some thread cutting gear at some point and give it a go
Penpal
Grand Master
Ian making a pen this way is rewarding, firstly as an achievement, then its gives a greater appreciation of kits we are able to buy in so many shapes and sizes. Love this pen.
Peter.
Peter.
GSteer
Registered
Nice work again Ian! What adhesive did you use to attach the acrylic to the wood?
Pierre, what would you use for pore-filling then? I've had similar with Bog Oak.
Pierre, what would you use for pore-filling then? I've had similar with Bog Oak.
And about the surface of the wenge, it could have deserved a little pore-filling operation.
.
Greg, I used medium CA to glue the inserts it's ready to turn about 15 min later. 2 methods I use for pore filling are to either mix some of the wood dust with Titebond to make a paste and then rub it in, allow to dry and sand or sprinkle wood dust on the pores and then drop some thin CA on to it.
AllenN
Fellow
That is a nice looking pen, I like the contrast between the wood and the acrylic. Not surprised it was a bit heart stopping threading that. Well done.
Les ELm
Executive Member
Nicely  done.
done.
Les
 done.
done.Les
I sand wood with coarse grain and slow speed and without aspiration. When there is enough dust on the sand paper I add a few drops of medium CA. Then I sand and polish the usual way.Pierre, what would you use for pore-filling then? I've had similar with Bog Oak.


