AndrewP
Apprentice Member
I thought that I would share this with you folks, apologies in advance if its teaching grannies how to suck egs
This is how I do it. probably how everyone else does it too :) Although the clamping jig is 100% my idea.
Each pen is made up of two perfectly square, in cross section, pieces of wood (blanks) each about 2.5 inches long

Having decided where on the pen the knot should go, in this case near the top, a 45degree angled cut is made across the blank. Note the piece of wood to the right of the the blank. this is there to make sure that each and every subsequent cut is made at exactly the same distance from the end of the pen. The saw cut is stopped just a mm short of cutting right through the blank to make clamping a lot easier

Next small pieces of veneer are cut. If this can be done without slicing off the end of your thumb it makes life a lot easier. This veneer has to be exactly the same thickness as the saw kerf. A drum sander helps with this, or knowing someone who has one ;)

The veneer is then glued into the saw kerf made earlier and clamped up.

When dry the excess veneer is cut flush with the blank. The blank is then rotated 90 degree and a second 45 degree saw cut is made. NB it is critical that this cut is made at EXACTLY the same distance from the end of the blank as the first cut or the knot will not join up evenly when turned.

A piece of veneer is then glued into this saw kerf and clamped up.

After each of the four sides have been cut and the veneers glued in place the blank looks like this.

The two blanks now need a hole drilling along their length to hold the pen mechanisms. This is done on the lathe as it is easier to hold the blank and centre the drill.

Brass tubes are then glued into the holes.

The blanks are then held in a mandrel which is held in the lathe while they are turned to the required shape.

And as if by magic the Celtic Knot appears.

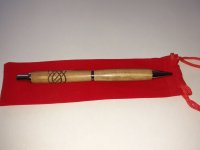
Apply a suitable finish and fit the mechanisms and voila

a double knot can also be done.

I use Araldite rapid for the tubes and PVA for the inserts.
my finish of choice at the moment is Chestnut’s melamine lacquer .
Slimline twist pen kits came from Axminster as did the Click pen in the last image.
I make this for pleasure for friends and family .
This is how I do it. probably how everyone else does it too :) Although the clamping jig is 100% my idea.
Each pen is made up of two perfectly square, in cross section, pieces of wood (blanks) each about 2.5 inches long

Having decided where on the pen the knot should go, in this case near the top, a 45degree angled cut is made across the blank. Note the piece of wood to the right of the the blank. this is there to make sure that each and every subsequent cut is made at exactly the same distance from the end of the pen. The saw cut is stopped just a mm short of cutting right through the blank to make clamping a lot easier

Next small pieces of veneer are cut. If this can be done without slicing off the end of your thumb it makes life a lot easier. This veneer has to be exactly the same thickness as the saw kerf. A drum sander helps with this, or knowing someone who has one ;)

The veneer is then glued into the saw kerf made earlier and clamped up.

When dry the excess veneer is cut flush with the blank. The blank is then rotated 90 degree and a second 45 degree saw cut is made. NB it is critical that this cut is made at EXACTLY the same distance from the end of the blank as the first cut or the knot will not join up evenly when turned.

A piece of veneer is then glued into this saw kerf and clamped up.

After each of the four sides have been cut and the veneers glued in place the blank looks like this.

The two blanks now need a hole drilling along their length to hold the pen mechanisms. This is done on the lathe as it is easier to hold the blank and centre the drill.

Brass tubes are then glued into the holes.

The blanks are then held in a mandrel which is held in the lathe while they are turned to the required shape.

And as if by magic the Celtic Knot appears.

Apply a suitable finish and fit the mechanisms and voila

a double knot can also be done.

I use Araldite rapid for the tubes and PVA for the inserts.
my finish of choice at the moment is Chestnut’s melamine lacquer .
Slimline twist pen kits came from Axminster as did the Click pen in the last image.
I make this for pleasure for friends and family .

