• Thanks for visiting The Penturners Forum today.

    There are many features and resources that currently you are unable to see or access, either because you're not yet registered, or if you're already registered, because you're not logged in.

    To gain full access to the forum, please log in or register now. Registration is completely free, it only takes a few seconds, and you can join our well established community of like-minded pen makers.

distribution box

donwatson

Fellow
Joined
May 27, 2014
Posts
2,714
Location
Glenrothes, Fife
First Name
Donald
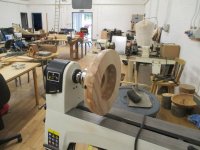
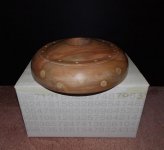
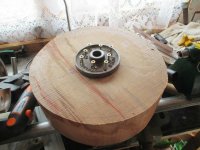
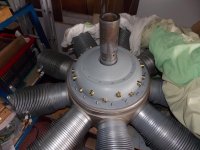
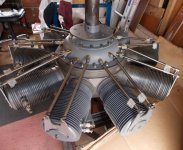
I have finished the turning of this distribution box in wood.
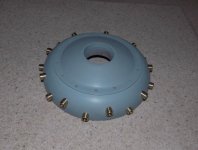
It has been passed to the engine fitters to seal, paint and make it look like metal.
I have some pics as it is nearly ready to be put in place
 

Attachments

  • pic_5.jpg
    pic_5.jpg
    63.8 KB · Views: 80
  • pic_06a_sized.jpg
    pic_06a_sized.jpg
    46.4 KB · Views: 79
  • pic_07_sized.jpg
    pic_07_sized.jpg
    55.8 KB · Views: 79

AllenN

Fellow
Joined
May 20, 2013
Posts
2,245
Location
Lancaster, UK
First Name
Allen
That’ s intriguing Don, what is it for? Reminds me of the electrical wiring why I was a child where all the pattress backplates were turned wood. When we moved into a house 35 years ago we found we still had some. They looked OK but always seemed to atttact the dreaded wood worm so out they had to come.
 

donwatson

Fellow
Joined
May 27, 2014
Posts
2,714
Location
Glenrothes, Fife
First Name
Donald
Hi Allen,
It is the fore end of a Le Clerget 9 cylinder rotary engine that powered a Sopwith Camel. This particular Camel was presented at the Royal Tournament in 1962. It was a rebuild by the apprentices at RAF Hendon at that time.
It has now passed to the Montrose Air Station Museum (Montrose Air Station Heritage Centre) where they are rebuilding the complete aircraft to museum standard.
This is the second aircraft I have been helping with and I find it great fun. It has been a fair bit of work turning to engineering limits using wood but we have managed (again). It has had some cotas of primer and a first assembly. It needs a final coat of metallic paint and final assembly.
I have attached a couple of pics.
Don W
PS I have loads of pics :drool:
 

Attachments

  • pic_02.jpg
    pic_02.jpg
    68.9 KB · Views: 48
  • pic_07b.jpg
    pic_07b.jpg
    67 KB · Views: 48
  • pic_08b.jpg
    pic_08b.jpg
    102.2 KB · Views: 48

Dalboy

Executive Member
Joined
Mar 20, 2014
Posts
7,708
Location
Kent
First Name
Derek
That is going to look fantastic once they have finished it Don and knowing that you are part of it in a small way you should be very proud. Great job
 
Warning! This thread has not had any replies for over a year. You are welcome to post a reply here, but it might be better to start a new thread (and maybe include a link to this one if you need to).
Top