• Thanks for visiting The Penturners Forum today.

    There are many features and resources that currently you are unable to see or access, either because you're not yet registered, or if you're already registered, because you're not logged in.

    To gain full access to the forum, please log in or register now. Registration is completely free, it only takes a few seconds, and you can join our well established community of like-minded pen makers.

Long Clicker Metallic Green

qquake2k

Fellow
Joined
Sep 9, 2015
Posts
1,070
Location
Northern California
First Name
Jim
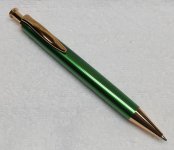
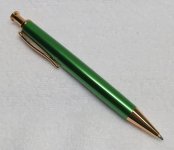
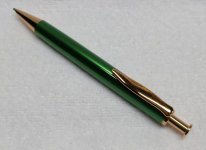
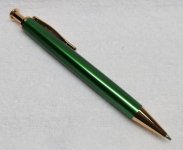
This is a Dayacom Long Clicker in bright copper. The blank is Metallic Green from Exotic blanks. I've wanted to make a Long Clicker for quite some time, and I'm glad I finally did. I like its simple elegance. I really like the green blank with the copper finish. There were several challenges involved, though, and Ill document them in subsequent posts.
 

Attachments

  • 066.JPG
    066.JPG
    38.5 KB · Views: 37
  • 067.JPG
    067.JPG
    36.7 KB · Views: 37
  • 068.JPG
    068.JPG
    35.3 KB · Views: 37
  • 069.JPG
    069.JPG
    36.7 KB · Views: 37
  • 063.JPG
    063.JPG
    131.5 KB · Views: 37
  • 064.JPG
    064.JPG
    115.9 KB · Views: 37
  • 065.jpg
    065.jpg
    36.1 KB · Views: 37
  • 064b.jpg
    064b.jpg
    39.7 KB · Views: 37

qquake2k

Fellow
Joined
Sep 9, 2015
Posts
1,070
Location
Northern California
First Name
Jim
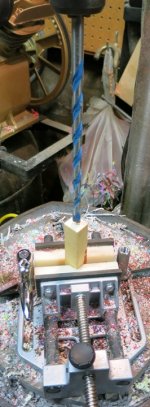
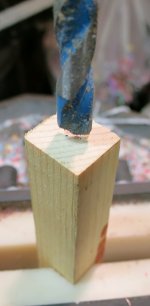
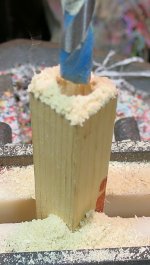
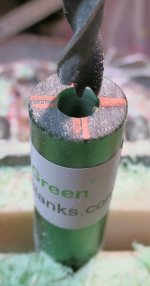
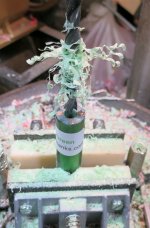
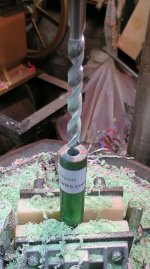
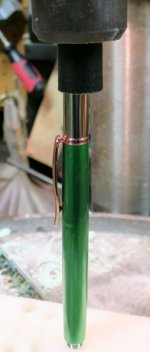
The first challenge I ran into was drilling the blank. It calls for a 4-1/2" blank, and they recommend a drill bit with long flutes. I tried a 10" long impact bit I have, but it wasn't accurate enough. Same with the 12" standard bit I have. So I used my normal brad point bit, and raised the blank periodically as I drilled it. But it wouldn't drill past the flutes, so I finished it with a helix bit. I finally got it drilled all the way through. It didn't drill all that straight, but it was good enough.
 

Attachments

  • 001.JPG
    001.JPG
    114.8 KB · Views: 36
  • 002.JPG
    002.JPG
    59.9 KB · Views: 36
  • 003.JPG
    003.JPG
    109.2 KB · Views: 37
  • 012.JPG
    012.JPG
    73.9 KB · Views: 37
  • 011.JPG
    011.JPG
    118.2 KB · Views: 37
  • 014.JPG
    014.JPG
    124.7 KB · Views: 38
  • 017.JPG
    017.JPG
    79.4 KB · Views: 36
  • 016.JPG
    016.JPG
    71 KB · Views: 37

qquake2k

Fellow
Joined
Sep 9, 2015
Posts
1,070
Location
Northern California
First Name
Jim
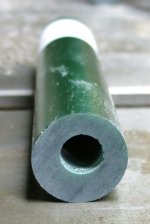
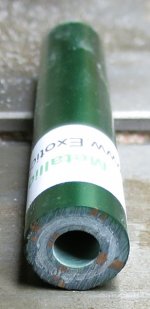
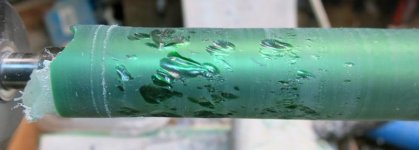
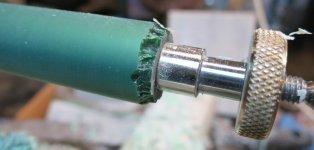
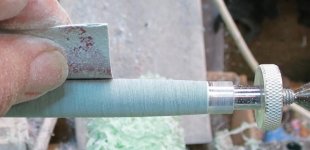
The next challenge wasn't with the pen, but with the blank. This particular blank was much more brittle than I expected. Turning it was as bad as, if not worse than, turning inlace acrylester. The spindle gouge I normally use chipped it very badly. So I switched to a carbide chisel, which was better. I wanted the body to have a slight bulge, but I was afraid to try shaping it with either chisel, as I was afraid the ends would chip out. That has happened to me in the past. So I reverted to the tried and true 120 grit chisel. That worked better than I expected. I polished it with my usual regimen, and it turned out quite nice. There are a couple of some sort of occlusions in the blank, but I don't think they look bad. They're not on the surface.
 

Attachments

  • 033.jpg
    033.jpg
    26.3 KB · Views: 34
  • 034.jpg
    034.jpg
    26.1 KB · Views: 34
  • 037.jpg
    037.jpg
    31.4 KB · Views: 34
  • 052.jpg
    052.jpg
    16.1 KB · Views: 35
  • 050.jpg
    050.jpg
    17.3 KB · Views: 34
  • 049.jpg
    049.jpg
    34.4 KB · Views: 35
  • 054.jpg
    054.jpg
    15 KB · Views: 35

qquake2k

Fellow
Joined
Sep 9, 2015
Posts
1,070
Location
Northern California
First Name
Jim
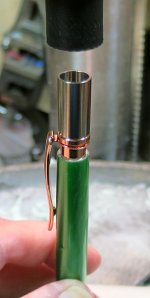
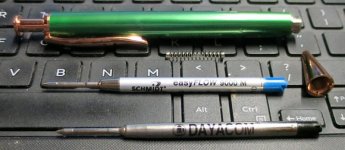
Assembling it was very easy, with only two parts to press into the body. It came with a sleeve to use for pressing the click mechanism into the finial end. Nice touch. But surprisingly, the Dayacom refill it came with wouldn't write. Fortunately, I ordered the upgrade EasyFlow refill with the pen kit. It writes well, but there is a ridge on the tip which kind of catches when the refill is retracted. Not as smooth as I like, but I can live with it.
 

Attachments

  • 062.jpg
    062.jpg
    18.8 KB · Views: 34
  • 060.JPG
    060.JPG
    60.5 KB · Views: 34
  • 061.JPG
    061.JPG
    51.8 KB · Views: 34
  • 070.jpg
    070.jpg
    47.4 KB · Views: 34
  • 073.jpg
    073.jpg
    55.2 KB · Views: 35

fortress

Registered
Joined
Apr 11, 2016
Posts
5,178
Location
Astley
First Name
John
Well done Jim, you overcame each problem as it presented itself and finished up with a very nice looking pen, great blank. :thumbs::thumbs:
 

flexi

Executive Member
Joined
Sep 12, 2014
Posts
6,454
Location
Maidstone
First Name
mark
That is a lovely pen and i love that blank it looks almost metal....another well done pen:drool::drool:
 

Buckeye

ペンメーカー
Executive Member
Joined
Oct 15, 2013
Posts
9,697
Location
UK
First Name
Peter
I do like the clicker it has a good length to show off nice blanks, the final finish looks great:thumbs: but you should try the skew, all my acrylics are done with a skew and there is never any chip out like you show.

Peter
 
Warning! This thread has not had any replies for over a year. You are welcome to post a reply here, but it might be better to start a new thread (and maybe include a link to this one if you need to).
Top