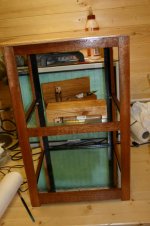
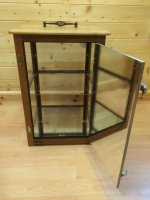
Mark (wm460) asked how I made this display case:
I started by preparing the uprights, which started as four by approx 30x30mm square and just over half a metre long each. Then I routed them on the router table in a number of passes, with the intention of achieving this profile:
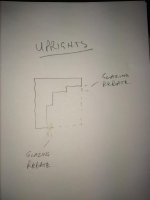
The cross-pieces started as rectangular lengths (approx 28x22mm) and had a glazing rebate routed along the relevant edges:

Note that the rebate was only necessary on BOTH edges for the centre crosspieces. Top and bottom only needed one rebate each.
With everything cut to length I used 4mm dowel pins to pin and glue the whole 'box' together (using formers to keep it in square):
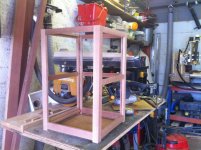
The rest was straightforward: Mount rails along the bottom and top of the box to secure the bottom shelf and the lid. Use glazing swivels to hold the acrylic in place. Drill for shelf pins to place the centre glazed shelf onto (the eagle-eyed among us will notice where I drilled too deep and came right out of the other side of one centre piece!) and add a hinged door (I used MDF as it is not visible from the front of the case.
Finishing touches included wiring the LED's using hot glue to hold the wires in place, painting the inside surfaces of the case black to 'hide' the workings, covering the base shelf and inside of door with mirror adhesive sheet, and screwing the lid on. I also painted the outside of the door black to neaten it.
Any questions please shout.
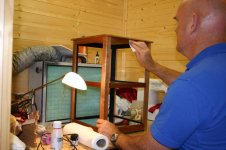

I started by preparing the uprights, which started as four by approx 30x30mm square and just over half a metre long each. Then I routed them on the router table in a number of passes, with the intention of achieving this profile:

The cross-pieces started as rectangular lengths (approx 28x22mm) and had a glazing rebate routed along the relevant edges:

Note that the rebate was only necessary on BOTH edges for the centre crosspieces. Top and bottom only needed one rebate each.
With everything cut to length I used 4mm dowel pins to pin and glue the whole 'box' together (using formers to keep it in square):

The rest was straightforward: Mount rails along the bottom and top of the box to secure the bottom shelf and the lid. Use glazing swivels to hold the acrylic in place. Drill for shelf pins to place the centre glazed shelf onto (the eagle-eyed among us will notice where I drilled too deep and came right out of the other side of one centre piece!) and add a hinged door (I used MDF as it is not visible from the front of the case.
Finishing touches included wiring the LED's using hot glue to hold the wires in place, painting the inside surfaces of the case black to 'hide' the workings, covering the base shelf and inside of door with mirror adhesive sheet, and screwing the lid on. I also painted the outside of the door black to neaten it.
Any questions please shout.


