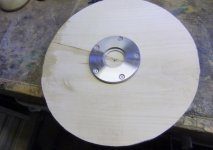
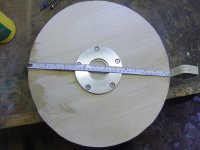
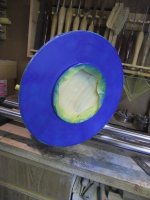
Well have been preparing a small project to start tomorrow not sure at what to do in respects of texture and colour I think it will be turn the main shape and see how things progress. The screws are C**p and had two shear on me at least the first one came out easy but the second is still in there so will have to turn it out like the one in the yew bowl I just finished.
-
Thanks for visiting The Penturners Forum today.
There are many features and resources that currently you are unable to see or access, either because you're not yet registered, or if you're already registered, because you're not logged in.
To gain full access to the forum, please log in or register now. Registration is completely free, it only takes a few seconds, and you can join our well established community of like-minded pen makers.
You are using an out of date browser. It may not display this or other websites correctly.
You should upgrade or use an alternative browser.
You should upgrade or use an alternative browser.
Penpal
Grand Master
Getting to like the progress pics of your projects Derek.
Thanks.....Peter.
Thanks.....Peter.
Can't wait to see it finished Derek.

A little tip for faceplate mounting. Find some "fattish" slotted short length imperial screws 10gm x appropriate length usually works. Self tapping screws can be used with a pilot drill also, but modern screws are useless.
A little tip for faceplate mounting. Find some "fattish" slotted short length imperial screws 10gm x appropriate length usually works. Self tapping screws can be used with a pilot drill also, but modern screws are useless.
Thank you Neil will see what I have in the fixings cupboard.
wm460
Grand Master
- Joined
- Mar 16, 2013
- Posts
- 23,113
- First Name
- Mark
Just a though do they make high tensile screws?

woodhacker
Fellow
- Joined
- Aug 22, 2015
- Posts
- 1,999
- Location
- Scot in exile in North East England
- First Name
- Peter also been called many others
Seeing as am a wee bit on the thick side, does that faceplate fit into a chuck.

Seeing as am a wee bit on the thick side, does that faceplate fit into a chuck.
Yes which is a good thing as if I changed my lathe then it will fit into the chuck rather than being a dedicated threaded one.
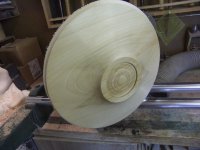
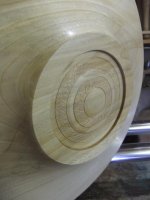
Anyway today I have turned the bottom and just need to apply the finish over the sander sealer. I decorated the area inside the chucking point as I cant swing this over the be to remove the chucking point.
I found a small split which meant that I had to reduce the diameter by about 1/2" and sealed and glued with thin CA glue.
Attachments
Penpal
Grand Master
Neat decoration on the base.
Petrer.
Petrer.
Your thoughts
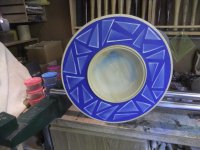
Well another day masking up spraying then masking up again and spraying well you get the idea. Now has a top coat on after touching up the paint creep on a few of them.
What are your thoughts on the design what does it remind you of I know what it is meant to be and what would you call it.
Tomorrow will be turning the bowl and applying the finish all over
Attachments
Penpal
Grand Master
REminds me of set squares, Pythagorus ? spelling, geometry with precision. I just love it.
Peter.
Peter.

