• Thanks for visiting The Penturners Forum today.

    There are many features and resources that currently you are unable to see or access, either because you're not yet registered, or if you're already registered, because you're not logged in.

    To gain full access to the forum, please log in or register now. Registration is completely free, it only takes a few seconds, and you can join our well established community of like-minded pen makers.

Some info on Daveygees kit

Woody

Registered
Joined
Jul 12, 2013
Posts
12,812
Location
at home
First Name
no
There are a few points that need to be addressed first on these kits one you need a 6" long blank
DSCF1814.JPGDSCF1814.JPG
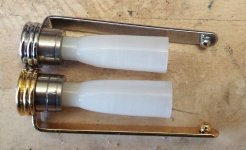
next the plastic gripper the R/B one is just a bit longer than the F/P so they cant be swapped around
DSCF1817.JPG
next the plastic gripper has a left hand thread so when adjusting to fit you need to remember that
DSCF1818.JPG
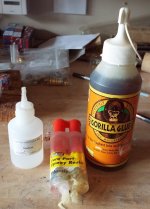
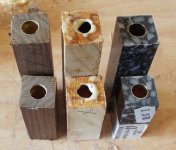
Now for making the pens I have made two with wood and one in plastic and used 3 different types of glue because with wood I think it is important to get a good purchase because of the bare wood end on the cap end so from left to right epoxy resin, Polyurethane glue and lastly Med super glue
DSCF1815.JPGDSCF1819.JPG
more to follow
 

paulm

grave manibus faciendum
Registered
Joined
Oct 7, 2013
Posts
12,046
Location
Sandford
First Name
Paul
You're starting to make me want to have a go on the ones I've got Brian... Nice pics... bring on the rest. :thumbs:
 

Woody

Registered
Joined
Jul 12, 2013
Posts
12,812
Location
at home
First Name
no
Now for turning done between centres as I haven't got any bushes turned to 12mm
View attachment 16267
sanded then again because of the exposed wooden end I applied a few coats of thin super glue to add strength to the wood looked after there is no reason why this pen shouldnt give years of good service
View attachment 16268
then eee friction polish and woodturners stick
View attachment 16269
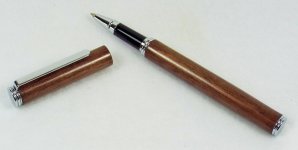
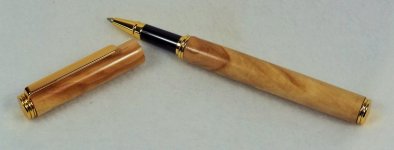
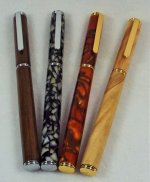
and here we have the finished pens which will be available for inspection on Sat LOL two in wood Mansonia and Chestnut one hard wood and one a bit soft and two in acrylic and I think both mediums work well on this kit
DSCF1824.JPGDSCF1826.JPGDSCF1829.JPGDSCF1830.JPG
 

ni9eofse7en

Registered
Joined
Jan 16, 2015
Posts
1,786
Location
Morley
First Name
John
Nice, I must have missed the thread about the kits though. Do you have a link or what are they called? Thanks.
 

Woody

Registered
Joined
Jul 12, 2013
Posts
12,812
Location
at home
First Name
no

daveygee

Full Member
Joined
Jul 2, 2014
Posts
321
Location
St Margarets at Cliffe, Near Dover
First Name
Dave
Woody - you very clever boy :wink::wink:

Like your adjuster for the plastic tube...:love_it:

Well done and brilliant finishes and Instructions excellent.

I will update my instructions on these now.

Many thanks
:thumbs::thumbs:
 

Indie Shed

Registered
Joined
Feb 24, 2015
Posts
447
Location
Leeds
First Name
Jimi
Brilliant guide Woody. I now an official liker of the pen, it's hard not to when it is finished as well as that. :love_it:
 

Penpal

Grand Master
Joined
May 26, 2013
Posts
25,342
Location
Canberra AUSTRALIA
First Name
Peter
The pens are smooth Woody how do they fit in the pocket for body length? Like your reinforcing on the bottom of the top I agree better to be sure especially when fitting together.Loved the pics and the straight talk mate.

Peter.:whistler::whistler::whistler:
 

donwatson

Fellow
Joined
May 27, 2014
Posts
2,714
Location
Glenrothes, Fife
First Name
Donald
Thanks for all the information Woody. The pens look very good :thumbs:
I am sure the first fountain pen I made was a Traditional. I would need to look up the old forums (Mervyn)
 
Warning! This thread has not had any replies for over a year. You are welcome to post a reply here, but it might be better to start a new thread (and maybe include a link to this one if you need to).
Top