• Thanks for visiting The Penturners Forum today.

    There are many features and resources that currently you are unable to see or access, either because you're not yet registered, or if you're already registered, because you're not logged in.

    To gain full access to the forum, please log in or register now. Registration is completely free, it only takes a few seconds, and you can join our well established community of like-minded pen makers.

The Tower

Dalboy

Executive Member
Joined
Mar 20, 2014
Posts
7,708
Location
Kent
First Name
Derek
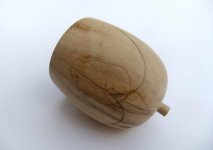
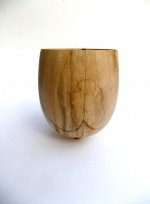
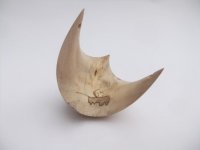
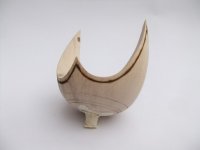
I have put this here and see how it goes. And then I will post the finished item in the correct place. I did start with a sketch with this one but due to a small detail that did not look right I went and cut another piece of wood to return it, but not wanting to waste the piece I decided to finish the base with a little modification and was going to put it to one side to make a new top well it has turned out better than expected and when I offered the top to it I liked what I saw.

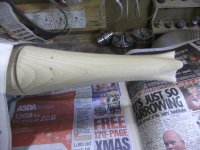
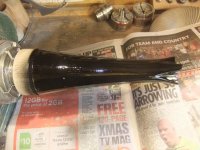
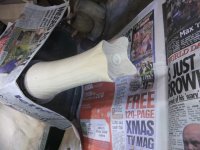
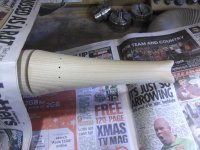
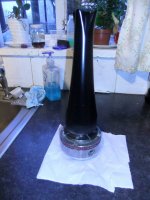
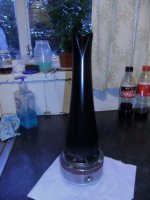
The first photo's are of the top with it marked out ready for some cutting. then there is the base unpainted with the modification sorry did not take any before shots, then there is one with the first coat on and as can be seen needs more work as the base will be a high gloss so as you can imagine a lot of prep work nearly 3 hours getting the finish I wanted before the paint is applied without this any blemishes will show like a sore thumb.
The next stage is to rub back the black and see if there are anybits that need a little filling like the grain. This was the only wood I had that was the correct size as it was either the right cross section but not long enough or too long but not the right cross section so Ash it was.
 

Attachments

  • DSCF9154.jpg
    DSCF9154.jpg
    22.8 KB · Views: 94
  • DSCF9160.jpg
    DSCF9160.jpg
    22.1 KB · Views: 93
  • DSCF9162.jpg
    DSCF9162.jpg
    68.9 KB · Views: 95
  • DSCF9176 (800x600).jpg
    DSCF9176 (800x600).jpg
    149.1 KB · Views: 96
  • DSCF9164 (800x600).jpg
    DSCF9164 (800x600).jpg
    141 KB · Views: 95
  • DSCF9163 (800x600).jpg
    DSCF9163 (800x600).jpg
    147.8 KB · Views: 97

Dalboy

Executive Member
Joined
Mar 20, 2014
Posts
7,708
Location
Kent
First Name
Derek
I like to try different things and some of them make me think which is a good thing. The problem being is that I have about 5 or 6 things on the go at any one time. I know that I have a top to a walking stick that I am carving as well as an elf again I am carving, then there are 20 things for a club demo, a pair candle sticks with a open twist support and an elephant scroll saw pattern that I need to finish. I am sure there other bits in the on the go box.
 

Dalboy

Executive Member
Joined
Mar 20, 2014
Posts
7,708
Location
Kent
First Name
Derek
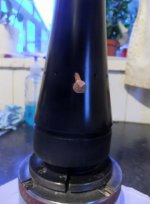
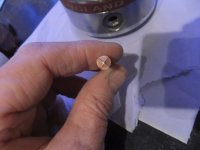
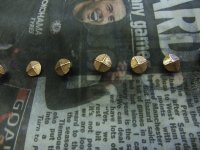
More of an update with "The Tower" the main support has now been complete except the added decoration of some copper nails which I liked because of the colour when cleaned up as well as the design on the head I put one in place they will be put right in once the black has dried overnight "I know you can use it before then".
There will be 12 of these around the base.This still needs parting off from the chuck as well.
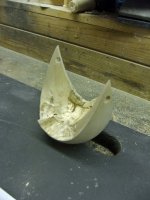
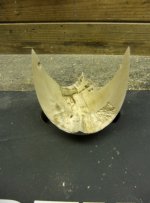
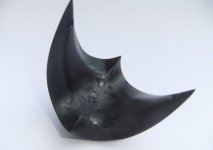
I then set to the top and have started to cut out the shape there is still more shaping and many will notice that the wall thickness is not even but that is intentional.
The only thing used was some abrasive to cut back the first coat of ebonising spray and the more spray as the top coat.
Hope to get the top shape finished and the nails stuck in place as well as parting the base off
 

Attachments

  • DSCF9185 (600x800).jpg
    DSCF9185 (600x800).jpg
    145 KB · Views: 56
  • DSCF9189 (600x800).jpg
    DSCF9189 (600x800).jpg
    134.8 KB · Views: 56
  • DSCF9193 (590x800).jpg
    DSCF9193 (590x800).jpg
    103.6 KB · Views: 55
  • DSCF9183 (600x800).jpg
    DSCF9183 (600x800).jpg
    138.1 KB · Views: 56
  • DSCF9180 (593x800).jpg
    DSCF9180 (593x800).jpg
    137.9 KB · Views: 56
  • DSCF9196 (800x600).jpg
    DSCF9196 (800x600).jpg
    90.3 KB · Views: 55

Dalboy

Executive Member
Joined
Mar 20, 2014
Posts
7,708
Location
Kent
First Name
Derek
I have never seen nails this shape before,the plot thickens.

Peter.

I had not either until I visited a turner friend who is a club member when at his place he said are these any good I will not use them and ny first thought was they could be used in a turning project but at that time did not know what. My wife says I am a hoarder for anything that I might be able to use in my hobby
 
Joined
Dec 14, 2017
Posts
1,105
Location
Lake District
First Name
Craig
I had not either until I visited a turner friend who is a club member when at his place he said are these any good I will not use them and ny first thought was they could be used in a turning project but at that time did not know what. My wife says I am a hoarder for anything that I might be able to use in my hobby

It's not hoarding if you use it Derek, the new term is up-cycling I believe, and you are simply doing your bit to help the environment for future generations. :thumbs::funny:

Regards

Craig

Craig
 

Dalboy

Executive Member
Joined
Mar 20, 2014
Posts
7,708
Location
Kent
First Name
Derek
Not a good day seem to have done alot but at the same time nothing achieved. Cleaned the heads of the copper nails and sprayed with a finish inserted them around the base and then went to part off top of tower kicked sideways and hit the tool rest just enough to damage the paint work. This is not a problem as I have managed to get a good match.

I also started some of the shaping of the top where I had cut the sections out sorry no photo's but hope to get some tomorrow.

Is anyone else here thinking Eye of Sauron?

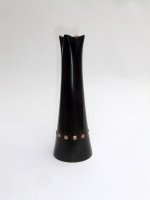
Yes me but then I am making it:banana: I liked the general shape of it in the film so thought why not just hope it works out as the top of the base did not look right when I first cut it square so I added the 4 flutes which now look Ok now that most of the material is cut out of the top otherwise it would have looked top heavy.
Not decided how I will do the eye at the top as that will need to be painted but then at the moment concentrating on the base and main top body
 

Pastor of Muppets

Full Member
Joined
Dec 5, 2017
Posts
279
Location
Oxford (ish)
First Name
Andy
Yes me but then I am making it:banana: I liked the general shape of it in the film so thought why not just hope it works out as the top of the base did not look right when I first cut it square so I added the 4 flutes which now look Ok now that most of the material is cut out of the top otherwise it would have looked top heavy.
Not decided how I will do the eye at the top as that will need to be painted but then at the moment concentrating on the base and main top body

I saw this way back and just sprung back to mind
 

Dalboy

Executive Member
Joined
Mar 20, 2014
Posts
7,708
Location
Kent
First Name
Derek
Thanks for that video Andy AKA [MENTION=1774]Pastor of Muppets[/MENTION], a interesting technique which would need to be reversed as I would be using it on wood now to see what paints I already have that will work like the nail varnish either that or I will have to go and buy some with the chance that I will get some funny looks:thinks:
 

Penpal

Grand Master
Joined
May 26, 2013
Posts
25,342
Location
Canberra AUSTRALIA
First Name
Peter
I experience such a feeling on a regular basis,I get my fingernails cut by a Vietnamese Lady who is the boss of the business in our nearby Mall. The first time I went in all eyes were on the male intruder, when she reached for the nail varnish I nearly freaked out. Her English is minimal. Now I go in point to my hand and she trims nails in a few minutes.WE wave as I go past to Aldis Store and the Chemist.

The best and cheapest way to buy varnish is on the net,also quite anonymous my daughter is heavily into craft that uses polish etc.

One of the most amusing U Tube vids is of a Vietnamese Nail Worker,side splitting actually,so real around here, there are four such places in the big mall near me.

Peter.
 

Dalboy

Executive Member
Joined
Mar 20, 2014
Posts
7,708
Location
Kent
First Name
Derek
After a small oops moment where I parted the lower section off it wipped to one side and hit the tool rest and damaged the paint work So after a little repair to that area and now no sign that it had occurred I was back onto getting some more work done on it.

The copper nails where cleaned and washed in soapy water and dried then the heads given a coat od varnish to stop tarnishing.

Once these where dry I glued them in place around the lower section

Back to the top piece which I had cut out so today was cleaning this up and plenty of sanding to 600grit all of this needed doing by hands

The last job is to burn s deep line all around the edge ready for texture to be added, once at that stage more colour to be added before moving onto the last piece of this build
 

Attachments

  • DSCF9198 (800x600).jpg
    DSCF9198 (800x600).jpg
    138 KB · Views: 25
  • DSCF9210 (600x800).jpg
    DSCF9210 (600x800).jpg
    71.9 KB · Views: 25
  • DSCF9219 (800x600).jpg
    DSCF9219 (800x600).jpg
    57.1 KB · Views: 25
  • DSCF9220 (800x600).jpg
    DSCF9220 (800x600).jpg
    58.1 KB · Views: 25

Penpal

Grand Master
Joined
May 26, 2013
Posts
25,342
Location
Canberra AUSTRALIA
First Name
Peter
Ours is a household with two hoarders. Just the other day I found a new use for the tool grinder after 30 yrs,you never know.

Peter.
 

Dalboy

Executive Member
Joined
Mar 20, 2014
Posts
7,708
Location
Kent
First Name
Derek
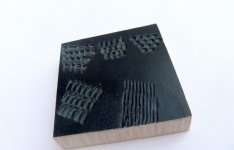
Could not make up my mind at what texture that I wanted and could not visalise it in my head so I did a test piece and gave it a quick coat of ebonising spray, thats better now can see which ine I want. I will also keep this test piece for future reference. Each of the patterns are created by different shaped Diamond burrs except the bottom right which was achieved using a little metal cutting disc.

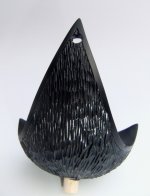
As it turned out it was the little disc pattern that won the day for me it took what seemed an age to cut little slits in the surface of this part and as can be seen I also left a band untouched around the edge.
A quick rub over with a abrasive brush that fits in a drill to get rid of any loose pieces, this was held in the hand as if I used a drill it would have not ended up looking so crisp.
A spray again with Ebonising to finish off and the inside as well as this helps to show any marks which this will need a little more sanding.
 

Attachments

  • DSCF9222 (800x515).jpg
    DSCF9222 (800x515).jpg
    87.3 KB · Views: 21
  • DSCF9227 (613x800).jpg
    DSCF9227 (613x800).jpg
    106.5 KB · Views: 21
  • DSCF9228 (800x565).jpg
    DSCF9228 (800x565).jpg
    68.2 KB · Views: 21
Warning! This thread has not had any replies for over a year. You are welcome to post a reply here, but it might be better to start a new thread (and maybe include a link to this one if you need to).
Top