• Thanks for visiting The Penturners Forum today.

    There are many features and resources that currently you are unable to see or access, either because you're not yet registered, or if you're already registered, because you're not logged in.

    To gain full access to the forum, please log in or register now. Registration is completely free, it only takes a few seconds, and you can join our well established community of like-minded pen makers.

Wooden pen clip pictorial

Jimjam66

Chief Battonager
Registered
Joined
Jan 27, 2013
Posts
3,775
Location
Basingstoke, Hampshire
I was asked a while ago how I do my wooden pen clips. First off I must admit that this process is covered in a document on Penturners Guild by Richard Kleinhenz. The only credit I take is being able to read and follow instructions.

First off, I run a 1/8" slice of walnut (or any dense, close, straight-grained timber) through the CNC machine. It's important that the grain runs as straight as possible along the clip to provide some strength.
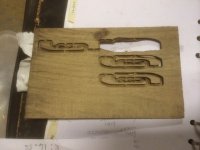
image.jpg

Once the clip is freed from the walnut, I work it into a rounded smooth shape using warding files and sandpaper. (If I'm going to break a clip this is when it happens!) Then I glue it to a stirrer stick with thin CA for finishing.
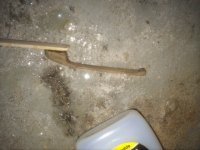
image.jpg

I finish using about four coats of thin CA, followed by 0000 steel wool and T-cut. While that's going on I prepare to cut the slot in the pen cap. First I decide where the clip will go.
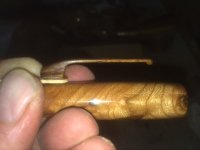
image.jpg

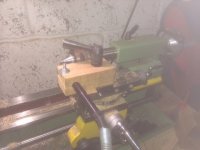
I mark off the extremities of the slot with masking tape, and use a pencil mark on the tape to align the slot. Then I mount the cap in the chuck if my metal lathe (you could use a wood lathe just as easily).
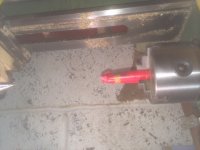
image.jpg

I have a wooden block that holds my Dremel handle in the toolpost. I mount a 1/8" end-mill in the Dremel, and without turning on the lathe I cut the slot in the cap until I see brass shavings telling me I'm at depth. (It's worth noting that I have halved the length of the tube usually used in the cap and set a smaller tube in the back half of the hole so that there is more depth for this process.)
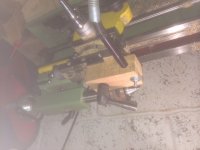
image.jpg
 

Jimjam66

Chief Battonager
Registered
Joined
Jan 27, 2013
Posts
3,775
Location
Basingstoke, Hampshire
Once I have a slot in the cap and a finished clip, the rest is just fettling. The slot is slightly undercut (it's easier to sand away the clip base than it is to fill in a gaping hole!) so some sanding and shaping is called for. Once the clip sits properly in the slot I epoxy it in.

image.jpg

Finally, a gratuitous shot of the whole pen, including the modified feed. Dontcha just love the bright red breather tube? Still don't know if it works as a bulbfiller, the next step is to find out if all my hard work was for nowt.

image.jpg
 

Jim

Grand Master
Joined
Oct 19, 2011
Posts
15,617
That is the next level of pen making David, again thanks for sharing my friend which i hope will inspire others ... :thumbs:
 

Penpal

Grand Master
Joined
May 26, 2013
Posts
25,342
Location
Canberra AUSTRALIA
First Name
Peter
David,

Totally impressed however yesterday my mate borrowed my carry pen of the day he was in a hurry granted but fumbled the removal of the cap then without warning pulled it straight out. First reaction was to shout loudly idiot but calmly enough said it is a screw thread holds the cap on. Oh he said screwed it back on then opened it with some reverence since he is my Bishop as well.

Somehow your beautiful clip would last thirty seconds in his hands made me immediately aware of the Hand Made Stalls last Saturday when I watched the masses doing their best to destroy pens on Brad my mates stall with his great variety of pens.

Wish there was some way of idiot proofing pens.:goesred: Any suggestions and what results in service have you had with the wooden clips in use mate?
 

Jimjam66

Chief Battonager
Registered
Joined
Jan 27, 2013
Posts
3,775
Location
Basingstoke, Hampshire
Peter, I hear you. I had a customer pull the thread ring clean out of the cap of a Pristina pen - fortunately David Lim idiot-proofs his pens as the thread ring is just a tight push-fit into the cap.

These clips are very fragile, there's no getting away from it. I do two things for customers: First, I tell them to treat the pen as a precious family heirloom (just because something is fragile doesn't mean it isn't valuable), and second, I tell them that the clip does NOT carry a guarantee. If they break it, they pay me to fix it. You'd think that would put people off, but I sell more of these type of pens than any other. A psychologist could make something of that ...

:nooidea:
 

edlea

Lobbygobbler
Registered
Joined
Aug 1, 2013
Posts
4,693
Location
Blackpool
First Name
Ed
Thanks for showing David ... all very interesting but that type of work is way beyond my present capabilities .
 

Buckeye

ペンメーカー
Executive Member
Joined
Oct 15, 2013
Posts
9,697
Location
UK
First Name
Peter
I was asked a while ago how I do my wooden pen clips. First off I must admit that this process is covered in a document on Penturners Guild by Richard Kleinhenz. The only credit I take is being able to read and follow instructions.

You could take the credit for having found the document in the first place, I still can't find it.

David is there any chance you could repost picture 5 the right way up, it's playing havoc with my neck trying to see it the right way.

Peter
 

Buckeye

ペンメーカー
Executive Member
Joined
Oct 15, 2013
Posts
9,697
Location
UK
First Name
Peter
The clip looks great and I can understand the fragility, but the beauty outweighs any downside.:up:

I don't have a mill as the space I have is so limited.

Peter
 

Charly Cheeky Chops

Apprentice Member
Joined
Dec 1, 2013
Posts
33
Location
Bedford
That is very clever David and Grumps says you are a star he,he I won't let him have his confuser back to log on with LOL.
I know how to make a metal one I saw Grumps doing it ages ago and cut some paper bits for him.
If you want to know how, open a thread called Metal clip and I will show Grumps secret LOL. Before he gets his confuser back. :ave_it:
 

Jimjam66

Chief Battonager
Registered
Joined
Jan 27, 2013
Posts
3,775
Location
Basingstoke, Hampshire
You could take the credit for having found the document in the first place, I still can't find it.

David is there any chance you could repost picture 5 the right way up, it's playing havoc with my neck trying to see it the right way.

Peter

Here's the article, Peter.

I hope I've got the right picture 5, AND that it comes out right way up this time.

image.jpg
 

Buckeye

ペンメーカー
Executive Member
Joined
Oct 15, 2013
Posts
9,697
Location
UK
First Name
Peter
David, thanks for sorting the photo. Thanks also for the link, I have just perused it and it looks great. I will definitely try that.

Peter
 
Warning! This thread has not had any replies for over a year. You are welcome to post a reply here, but it might be better to start a new thread (and maybe include a link to this one if you need to).
Top