-
Thanks for visiting The Penturners Forum today.
There are many features and resources that currently you are unable to see or access, either because you're not yet registered, or if you're already registered, because you're not logged in.
To gain full access to the forum, please log in or register now. Registration is completely free, it only takes a few seconds, and you can join our well established community of like-minded pen makers.
Yet another Bullet pen.
- Thread starter Grump
- Start date
Umm, have you turned it a bit too far? Still, it looks good Brian. What is the clip off, that's nicer than the slimline.
Yes it would appear so, I actually used the case as the bushes and slipped the cases over the top and bottom as I took them down.
It was a fine until I burnished the shine on and that was when everything went pear shaped.
The blank seemed to shrink and I rubbed all the black from the brass into the woodgrain.
Should have sealed first, back to the drawing board with this one I think.
The clip is the one that was in the kit, unsure where I got the kit from, it would be an old one as I haven't bought any kits for ages.
The tip looks like the bullet has flared slightly bit it might just be the pic.
Yes it would appear so, I actually used the case as the bushes and slipped the cases over the top and bottom as I took them down.
It was a fine until I burnished the shine on and that was when everything went pear shaped.
The blank seemed to shrink and I rubbed all the black from the brass into the woodgrain.
Should have sealed first, back to the drawing board with this one I think.
The clip is the one that was in the kit, unsure where I got the kit from, it would be an old one as I haven't bought any kits for ages.
I used the case as the bushing too Brian but sanded it down the last thou and I always sanded from wood to brass. I just noticed that its in one piece too. Nice one.
Penpal
Grand Master
Brian, I agree all round. Mahogany suits the pen well.
Peter.
Peter.

Maurice
Full Member
I know it must be here somewhere but can anybody tell me where I can find details of how to make a pen from a shotgun case. A friend has said their gun club has boxes of used cases
and I can have as many as I would like.
and I can have as many as I would like.
I know it must be here somewhere but can anybody tell me where I can find details of how to make a pen from a shotgun case. A friend has said their gun club has boxes of used cases
and I can have as many as I would like.
i can see that been a very chunky pen
Maurice
Full Member
i can see that been a very chunky pen
Well I hate to see things going to waste
How observant you all are, yes Frankie the nib end of the bullet has flared and I hadn't noticed until you pointed it out.
The shrinkage of the wood is more prominent in the picture than in real life.
It has now been dismantled ready to go back on the lathe tomorrow or at the weekend.
I'll do a how to when I redo it anyone wanting to know will get the idea of it init?
That was a bit of fun showing a bad un init we can't get em all right all the time eh we have to learn so we can show dunit?
Mark 2 today after resetting all my workshop equipment yesterday lets see if I learned anything from the previous effort.
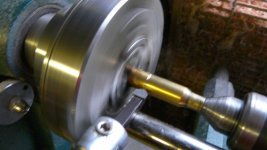
First thing I did think of was that it would be easier to do this in two parts and that the bottom part does not need a sleeve all the way through.
A trial run here with just a plug to line everything up correctly and hold it in place, chop the bullet about 2/3rds from the tip.

Use the top and bottom as your bushes and turn down a drilled blank of any sort as it won't be seen, approx 1 inch and slip inside the bottom part.
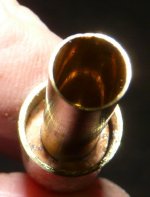
make sure its forced well in and allows room for the tenon that will be on the top part, insert the tube to the required position but don't press the nib in yet, glue it up at this position.
Picture shows nib fitted for illustration only, to show the finished bottom before fitting transition and assembly.


Now the top part as a separate section.
Measure the inside depth of the bullet top which I had drilled at 6.9mm and mark your drilled blank to allow for a tenon at both top and bottom and of course your top tube.
Cut the top tenon first and insert this into your bullet top.

Sorry my camera battery went flat at this point I will continue to describe procedure but if you want more pics I will do some on the next effort.
Next cut the bottom tenon and insert this into the bottom bullet part to ensure the fit is correct.
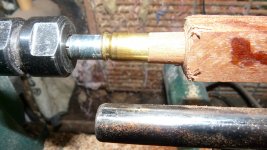
At this point I put the whole thing on the mandrel, that's the reason for leaving the nib out.
I did have a very tight fit so took a tad more off the diameter and enlarged the drilling with a file to ensure a smooth turn on the transmission.
I don't think I have mentioned I didn't glue the top tube in as yet, it is just inserted to fit and take the slack on the mandrel.
Now I know it all fits together I can glue the top tube in inserting it from the bullet top end, although I left it until it all came off the mandrel.
It's time to turn the barrel down to the desired shape and size and finish as required polishing the whole thing while still on the mandrel brass and all.
Take it off glue me tube in and fit it all together take indoors and charge my batteries for a pic of the completed item.
This way worked for me to produce a sturdy pen with no centre band init?

What do you reckon?
First thing I did think of was that it would be easier to do this in two parts and that the bottom part does not need a sleeve all the way through.
A trial run here with just a plug to line everything up correctly and hold it in place, chop the bullet about 2/3rds from the tip.

Use the top and bottom as your bushes and turn down a drilled blank of any sort as it won't be seen, approx 1 inch and slip inside the bottom part.
make sure its forced well in and allows room for the tenon that will be on the top part, insert the tube to the required position but don't press the nib in yet, glue it up at this position.
Picture shows nib fitted for illustration only, to show the finished bottom before fitting transition and assembly.


Now the top part as a separate section.
Measure the inside depth of the bullet top which I had drilled at 6.9mm and mark your drilled blank to allow for a tenon at both top and bottom and of course your top tube.
Cut the top tenon first and insert this into your bullet top.

Sorry my camera battery went flat at this point I will continue to describe procedure but if you want more pics I will do some on the next effort.
Next cut the bottom tenon and insert this into the bottom bullet part to ensure the fit is correct.
At this point I put the whole thing on the mandrel, that's the reason for leaving the nib out.
I did have a very tight fit so took a tad more off the diameter and enlarged the drilling with a file to ensure a smooth turn on the transmission.
I don't think I have mentioned I didn't glue the top tube in as yet, it is just inserted to fit and take the slack on the mandrel.
Now I know it all fits together I can glue the top tube in inserting it from the bullet top end, although I left it until it all came off the mandrel.
It's time to turn the barrel down to the desired shape and size and finish as required polishing the whole thing while still on the mandrel brass and all.
Take it off glue me tube in and fit it all together take indoors and charge my batteries for a pic of the completed item.
This way worked for me to produce a sturdy pen with no centre band init?

What do you reckon?
- Joined
- Jan 31, 2013
- Posts
- 9,504
- First Name
- Terry
Nice one Brian. Thanks for the photos !!!!


