Bob,
I ve got two sets of Cole or Button Jaws, one I made myself and a smaller set that is a standard Ax part, the latter is 340956 and I am sure that I have used this on my AWVSL in the dim and distant. Cant check as my small lathe is iin winter storage as its the one I turn at shows.
However, here is pics of one part of the jaws that I made myself. You'll need 910405 which have gone up ridiculously in price, a number of spare 7mm tubes, plywood, 6mm bolts, washers nuts and screws, thats about it.
Heres the pics
Here's what I did (from memory) but there are probably other ways.
1 Put a scrap bit of wood in your jaws that is about 5 inches across, turn it ever so slightly concave or flat if you're perfect.
2 Cut a disc of ply (15mm +) that is the maximum diameter that you can turn div by two, now the radius, less the jaw movement that you can achieve on your jaws, then add 10mm for fun.
3. mark the centre of the ply and draw a perfect cross passing through the middle.
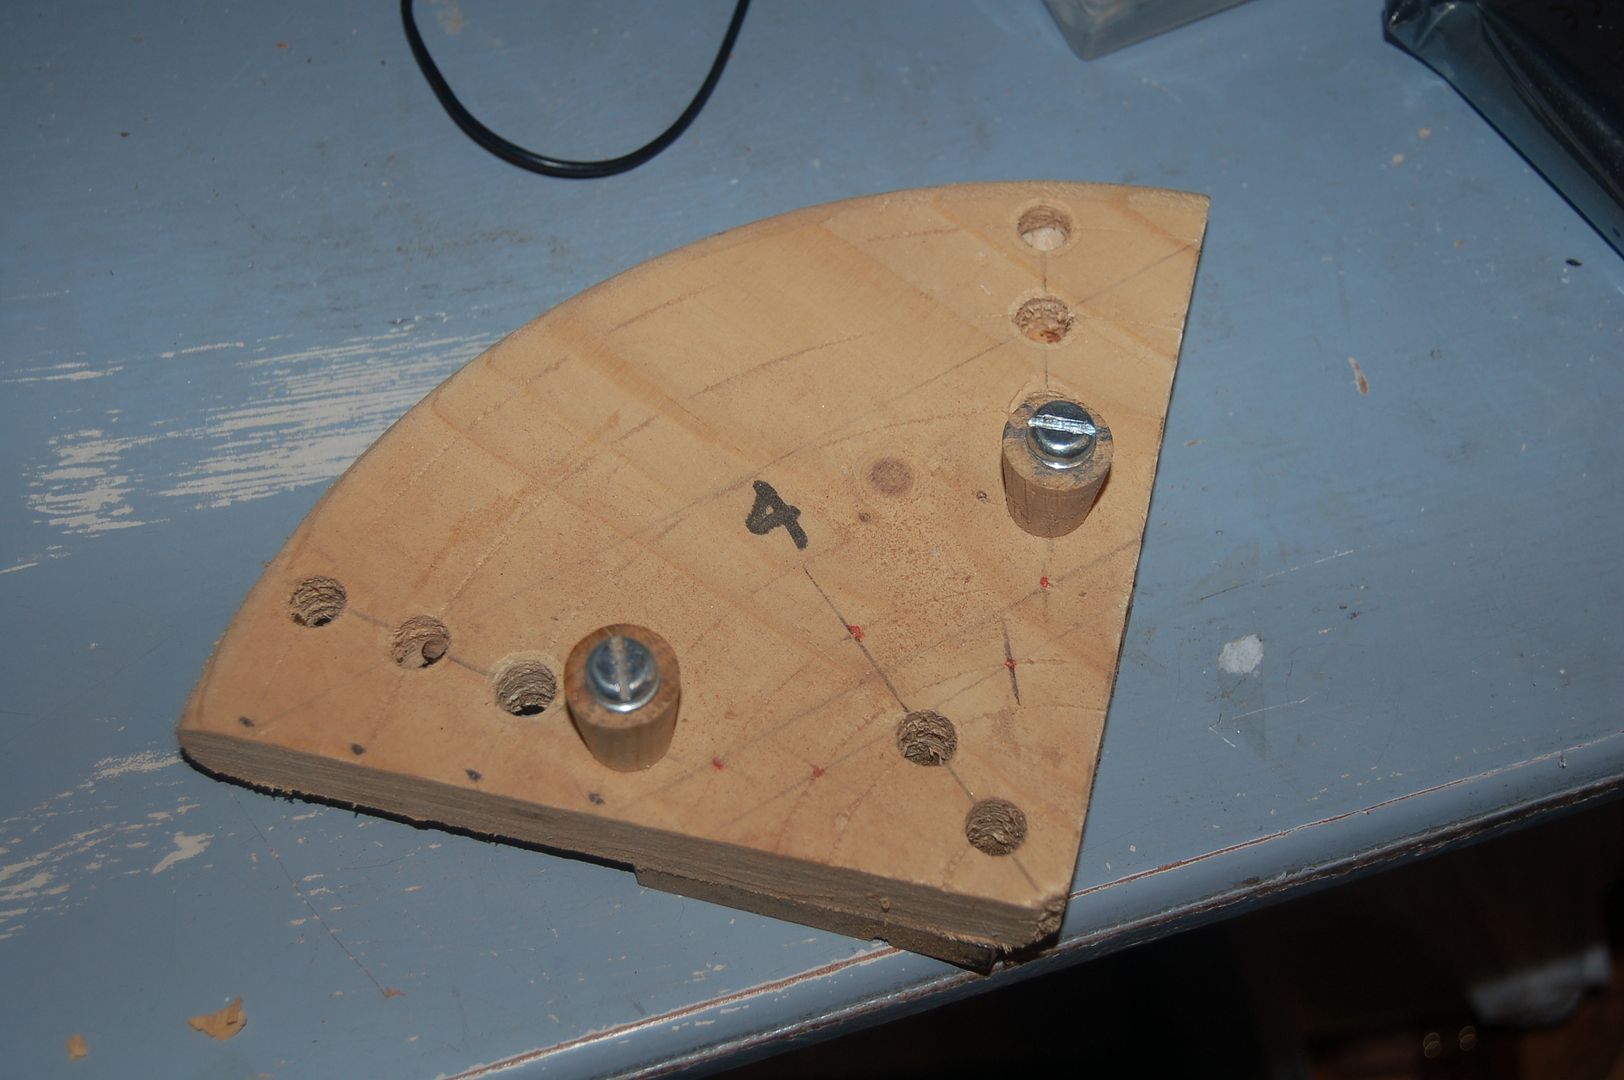
4 Sub divide each sector with two further lines (that pass throught the centre) that will form the lines on which the holes will be drilled to accept the buttons as in the first photo, they shouldnt be equally spaced with the other lines but be off set so they are towards the extremes of each sector
5 Drill a pilot hole through the centre of the ply wood and having marked the centre of the scrap with a skew, screw the ply to the scrap.
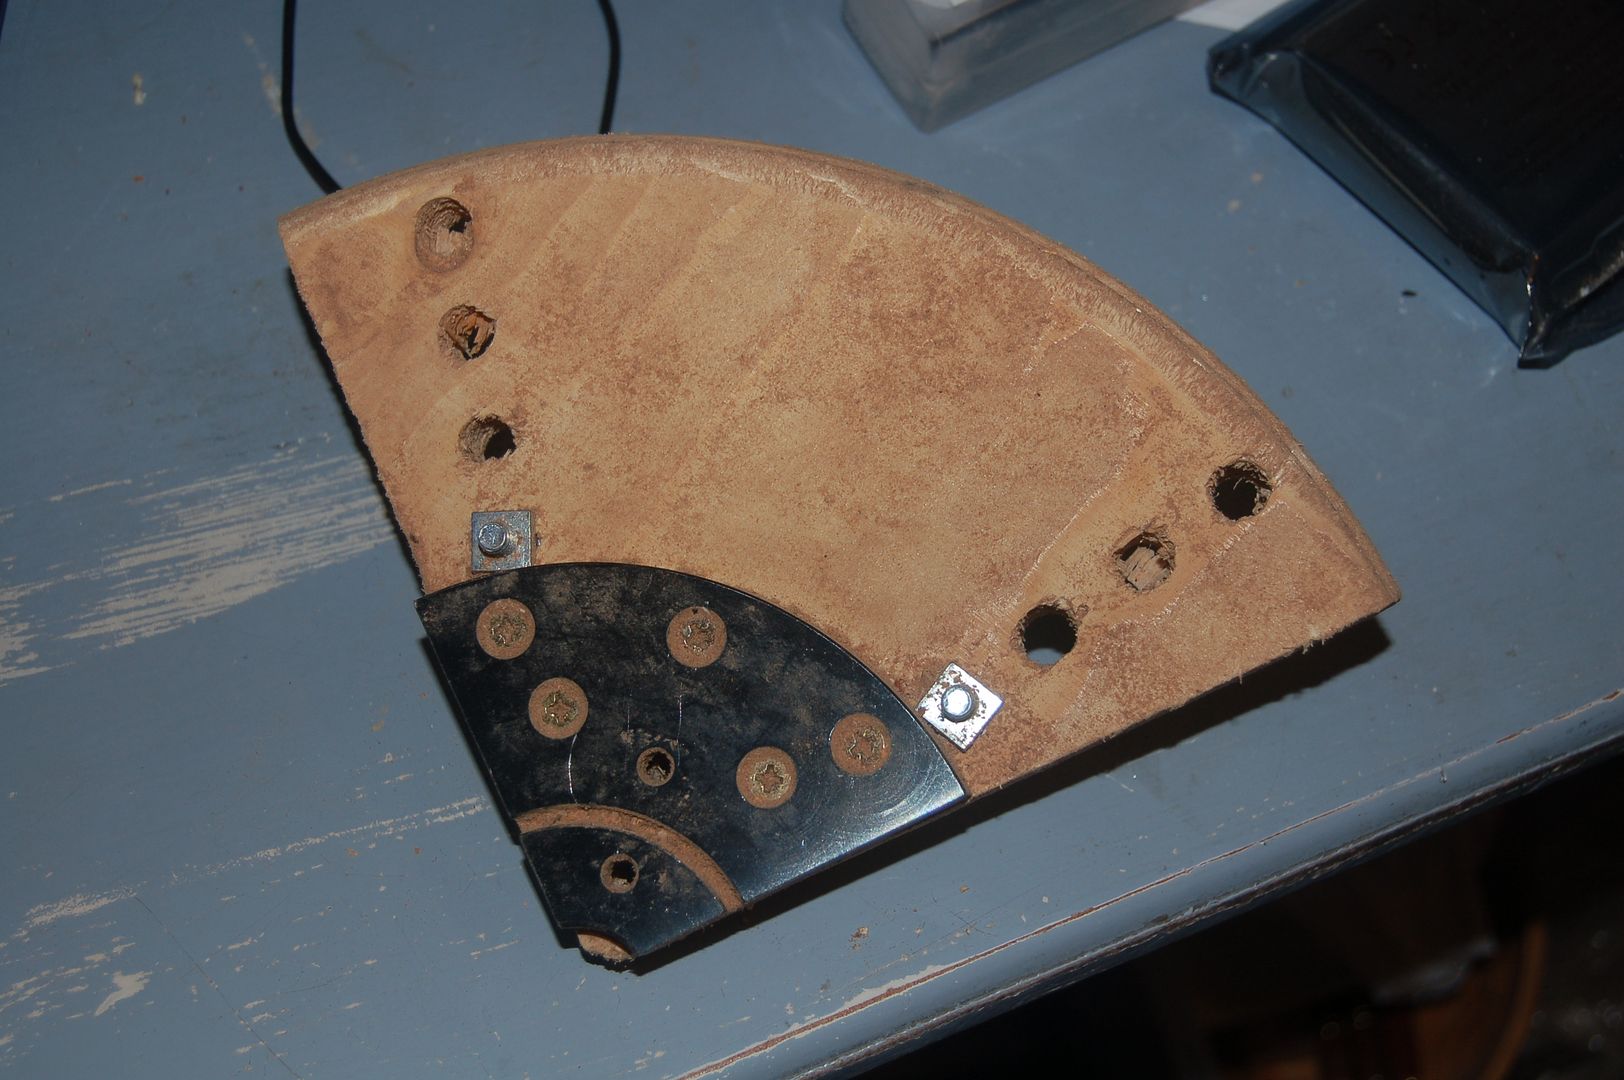
6 Mark a circle on the front to show the extent of the mounting plates 340956 which will be fixed later to the back.
7 Spin the lathe and make sure the disc is perfectly circular, stop it and then mark off at appropriate intervals on one of the main axis that you previously drew, points to indicate the radii of the holes to accept the buttons. Rotate the ply by hand holding a pen against the disc to create perfect circles, I then span the lathe and held a skew flat on the rest against the marks so that the lines were indelibly inscribed on the ply, it helped locating the lip and spur drill later.
8 Take the disc off and drill the holes for the buttons.
9 Carefully cut the disc into four along the first main axis that you drew. I also numbered the segments but they should all be identical so in theory there should be no real reason.
10 Turn the segments over and place the jaw plate on the wood. Mark off the location of the two holes through which the machine screws will pass to secure the assembled plates to the chuck. remove the plates and drill an appropriate size hole so the head of the machine screw can pass through the wood to the face of the jaw plate.
11 Put the plate on the back of the button jaw segment and making sure that it is in the right place, screw it on
12 Repeat with the other segments.
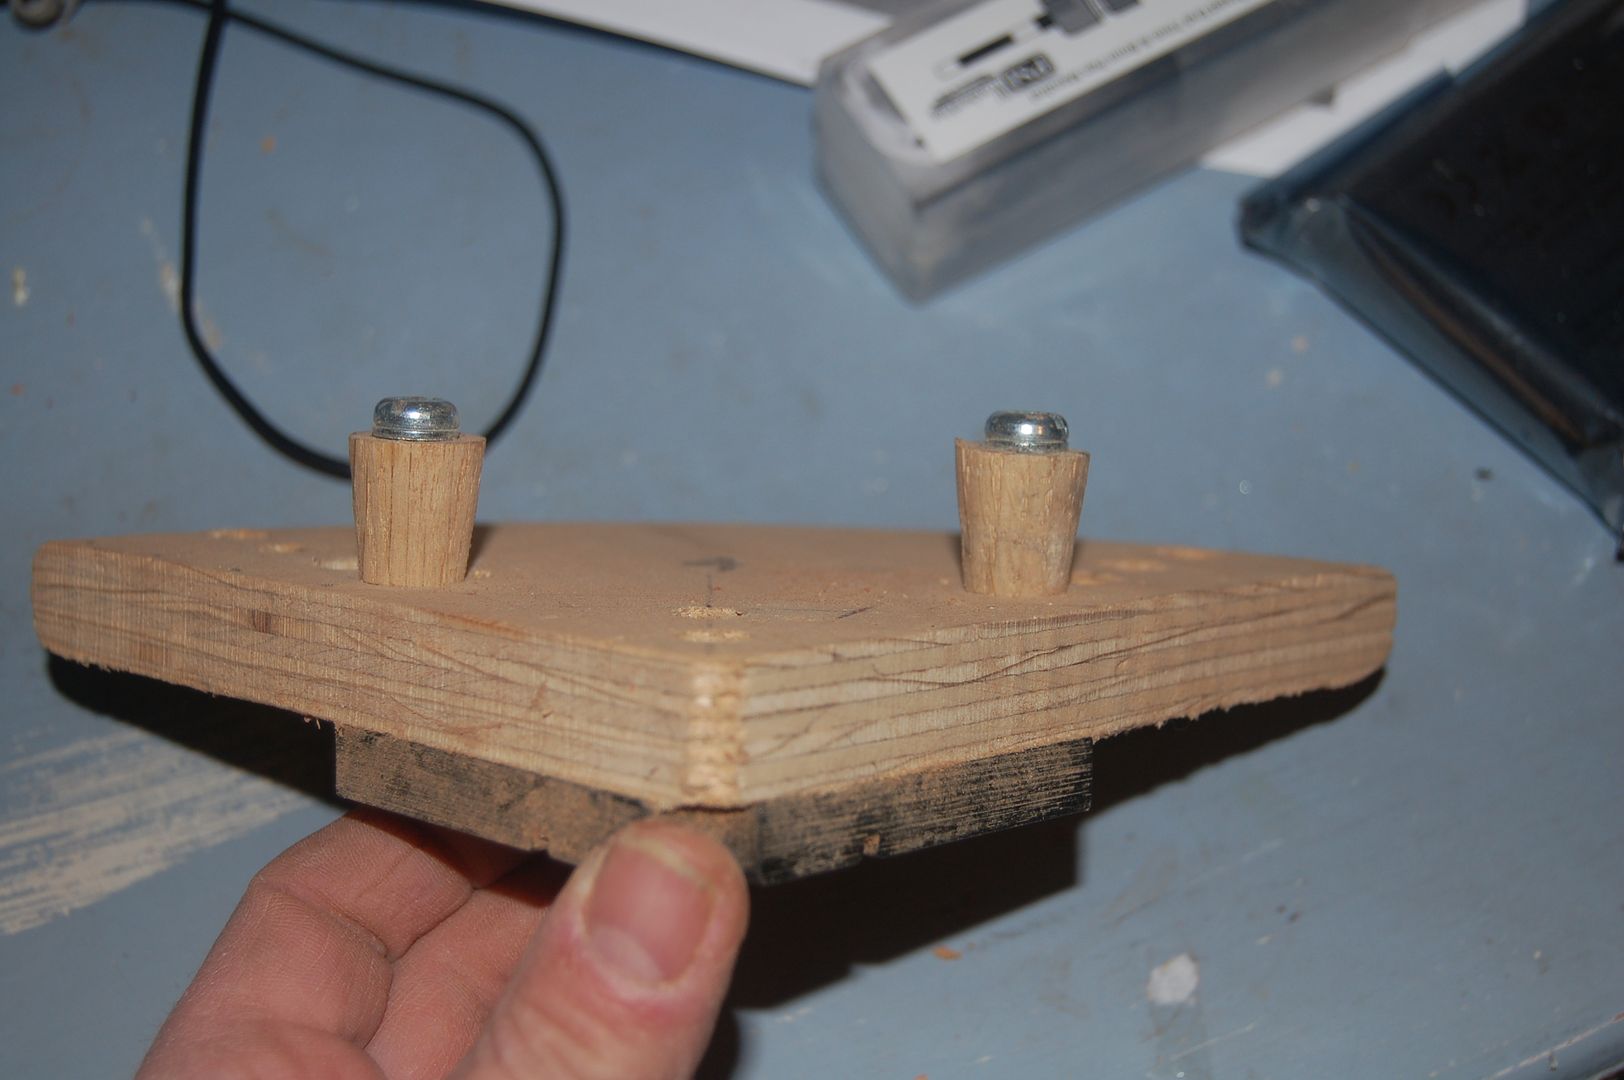
13 Take a piece of hard wood such as oak and form a tube with an 18mm long section into a tapered plug in the picture, repeat a tedious eight times. In my design the brass tube extends all the way through the ply ( bar 2mm to give some room for it to be tightened) As such the holes to accept the buttons are 7mm.
14 Put it altogether and it should work no problem.

 :crybaby:


