• Thanks for visiting The Penturners Forum today.

    There are many features and resources that currently you are unable to see or access, either because you're not yet registered, or if you're already registered, because you're not logged in.

    To gain full access to the forum, please log in or register now. Registration is completely free, it only takes a few seconds, and you can join our well established community of like-minded pen makers.

7.62 Part Two

paulm

grave manibus faciendum
Registered
Joined
Oct 7, 2013
Posts
12,046
Location
Sandford
First Name
Paul
use the top tube and a centre band to measure the length required for the blank
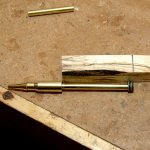
18.jpg

Cut the blank to that lenth, drill the hole and glue in the brass tube. The tube won't go all the way through so keep it at one end. Then when the glue is dry, square off the ends
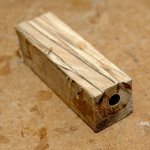
19.jpg

I have made some bushes up from another cartidge; one has a piece of the tube projecting from it which will be used to go in the end of the blank where there isn't any tube and the other bushing has a part with no tube that will become usefull later.
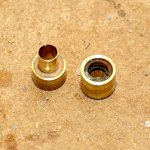
20.jpg

Mount the blank in the madrel and turn it down to the bushes
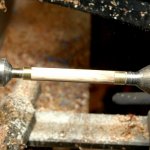
21.jpg

Mark on the blank the amount of blank to remove that will fit inside the top of the bullet.
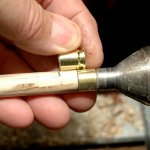
22.jpg

Turn that wood off the blank down to the tube
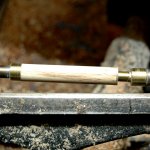
23.jpg

turn the bushing around so that the tube fits into it and polish the blank or finish with ca etc.
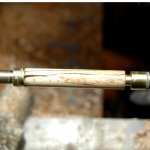
24.jpg

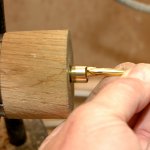
Now expand the hole in the clip so that it fits over the 7mm tube.
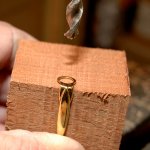
25.jpg
 

paulm

grave manibus faciendum
Registered
Joined
Oct 7, 2013
Posts
12,046
Location
Sandford
First Name
Paul
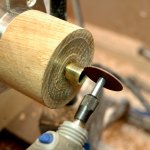
Use a Dremel to cut a notch in the end of the top cap

26.jpg

This should allow the clip to just fit inside.

27.jpg

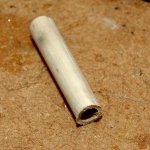
Turn a gash piece of wood to the diameter of the inside of the cap

28.jpg

and cut a piece so that its just shorter than then inside length of the cap (to allow for the clip)

29.jpg

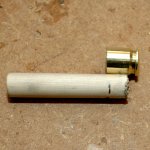
Glue this piece onto the end of the tube not forgetting to put the clip on first.

30.jpg

Glue to cap on and you're finished TA DA!
 

paulm

grave manibus faciendum
Registered
Joined
Oct 7, 2013
Posts
12,046
Location
Sandford
First Name
Paul
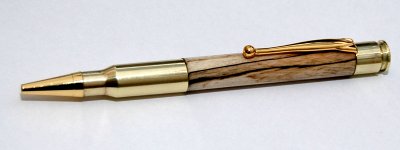
The finished article

31.jpg

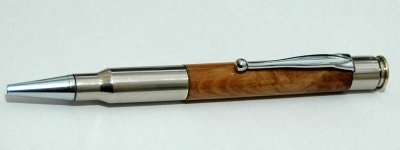
I made a nickel plated one at the same time.

32.jpg
 

paulm

grave manibus faciendum
Registered
Joined
Oct 7, 2013
Posts
12,046
Location
Sandford
First Name
Paul
There may be many other ways to make these pens and some of the others on this forum and already given me tips... like SHUT UP!

Others have been more constructive and added things such as Grump saying use gripfill instead of turning the narrow end of the nib which is a bit of a pain. Woody turns them with centers instead of a mandrel and I'm sure there are many other enhancements, just let me know :thumbs:
 

Woody

Registered
Joined
Jul 12, 2013
Posts
12,812
Location
at home
First Name
no
Well done Paul a very simple way to do it yes a few differences to the way I do it but the same outcome in the end just that my way is right :face::face::funny::funny::mooney2:
 

paulm

grave manibus faciendum
Registered
Joined
Oct 7, 2013
Posts
12,046
Location
Sandford
First Name
Paul
Great tutorial Paul, any chance this can be made into a pdf to download please? [emoji3]

sure Ray... give me a while and I'll do it. :thumbs:

Isn't Gary Glitter a pdf file? ... ok I'll get my coat.
 

Jim

Grand Master
Joined
Oct 19, 2011
Posts
15,617
Excellent Paul, you have made this look so easy my friend .. I hope you won't mind me adding this to the tutorials when i get the time .. :thumbs:
 

Lons

Fellow
Joined
Dec 17, 2013
Posts
4,758
Location
Northumberland
First Name
Bob
I'm sure there are many other enhancements, just let me know :thumbs:

Great tutorial Paul.

One thing I do very slightly different when drilling the clip. I drilled a shallow hole in the block with a front notch to sit the clip in while drilling. I use a plastic quick action clamp to hold it in place as well. Reason is 'cos the first one I did snatched, twisted the clip and nipped my finger. Not happened since.

Bob
 

paulm

grave manibus faciendum
Registered
Joined
Oct 7, 2013
Posts
12,046
Location
Sandford
First Name
Paul
Excellent Paul, you have made this look so easy my friend .. I hope you won't mind me adding this to the tutorials when i get the time .. :thumbs:

No thats fine Jim, please do.
 

rowdyyates115

It's Showtime.....
Fellow
Joined
Jun 22, 2013
Posts
2,156
Location
Portsmouth, UK
Love the tutorial Paul. Will give it a go soon - after I have cracked nickel plating in my shed, getting there. Will post the out the outcome shortly.

:thumbs::thumbs::thumbs:
 

paulm

grave manibus faciendum
Registered
Joined
Oct 7, 2013
Posts
12,046
Location
Sandford
First Name
Paul
Love the tutorial Paul. Will give it a go soon - after I have cracked nickel plating in my shed, getting there. Will post the out the outcome shortly.

:thumbs::thumbs::thumbs:

I look forward to seeing that Rowdy but after your thread with Brian the last time it nearly cost me a kit to do gold/nickel plating and I forgot about it for a while so hopefully it won't look absolutely excellent so that I won't have to buy kit :funny:
 

Robert

Full Member
Joined
Jun 9, 2014
Posts
205
Location
Totternhoe, Beds
First Name
Rob
Got hold of a few bullet cases this morning, my partners son has loads of them. So dying to give this a go now. Thanks for that Paul.

My only issue is I don't have a dremel, so will have to file the notch for the clip I guess
 
Warning! This thread has not had any replies for over a year. You are welcome to post a reply here, but it might be better to start a new thread (and maybe include a link to this one if you need to).
Top