-
Thanks for visiting The Penturners Forum today.
There are many features and resources that currently you are unable to see or access, either because you're not yet registered, or if you're already registered, because you're not logged in.
To gain full access to the forum, please log in or register now. Registration is completely free, it only takes a few seconds, and you can join our well established community of like-minded pen makers.
Celtic Knot Fail, 4 attempts :-(
- Thread starter Bammer
- Start date
You gotta drill through center of the knot not center of blank init?
Am I teaching eggs sucking?
Sorry, but I am thick ....... center of knot as opposed to center of blank ??????
Macaronytony
Graduate Member
When you have all 4 cuts done where they form a cross take a centerline up to each end on all for sides, then on the end of the blank join them up to give you the center of the knot..
I just wrote this and don't understand it, you are getting there.

I just wrote this and don't understand it, you are getting there.

You can cut all the way through if you want
Just make the material thats glued in the same kerf
As was removed by the blade you can cut strips to fit.
Just make the material thats glued in the same kerf
As was removed by the blade you can cut strips to fit.
woodhacker
Fellow
- Joined
- Aug 22, 2015
- Posts
- 1,999
- Location
- Scot in exile in North East England
- First Name
- Peter also been called many others
I've just tried and failed miserably with two fresh blanks. They were spalted beech. Knots was all over the place. Still its practise. 

I've just tried and failed miserably with two fresh blanks. They were spalted beech. Knots was all over the place. Still its practise.
Try using stable woods. spalted woods are soft crap all but rotten woods, cross cutting them will be a nightmare to get a smooth edge unless you do stabilise it.
I've just tried and failed miserably with two fresh blanks. They were spalted beech. Knots was all over the place. Still its practise.
I haven't tried since the last time, perhaps I'll have a go tonight now I've been told how stupid I was ....
So that's why you gave me some spalted silver birch and spalted beech blanks Grump .....

I haven't tried since the last time, perhaps I'll have a go tonight now I've been told how stupid I was ....
So that's why you gave me some spalted silver birch and spalted beech blanks Grump .....
I have loads of rotten wood if you want more mate.


Pierre
Fellow
The other thing to remember is that the wood being inserted must be the exact thickness of the kerf and when you clamp up you mustn't overtighten the end clamp else it will break or bend the last millimetre left and you will get broken knots and your crossover measurement won't be correct; you should also tighten up the side clamp at the same time as the end clamp. In theory the clamps should only be tightened up a fraction to prevent the insert and glue combined from moving too much as they settle and dry. However it is tempting to tighten up just that bit more to ensure that the glue is tight!!
PG
After edit My only other comment would be to move the knot up a bit toward the top so as to retain some proportion, ie 2/3 blank below and top 1/3 containing the knot. Otherwise there isn't too much wrong there.
PG
After edit My only other comment would be to move the knot up a bit toward the top so as to retain some proportion, ie 2/3 blank below and top 1/3 containing the knot. Otherwise there isn't too much wrong there.
Terry Q
Fellow
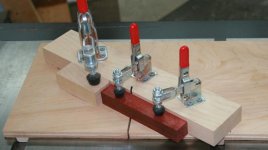
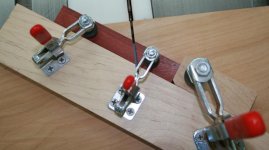
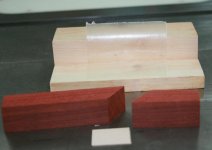
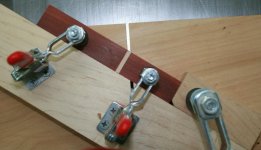
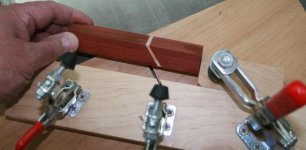
Sorry if this is long. I try to remove as many variables as possible. This is the rig I made to hold the blank for cutting. Second picture the blank has been cut. Last pic the pieces ready to glue. My glue jig is a 2x4. Wax paper is used to keep from glueing the blank to the jig.
Attachments
Terry Q
Fellow
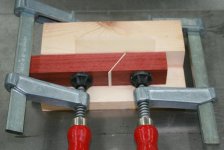
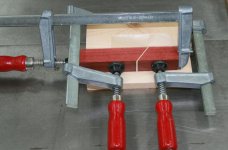
I apply glue to one face of the blank and rub the insert back and forth to get good glue surface. Apply glue to the other section and rub together. I clamp both halves to the jig then clamp the blank pulling everything together.
Attachments
Terry Q
Fellow
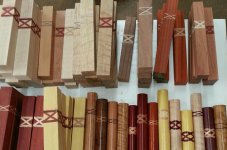
After the blank has dried I clean up the blank in a belt sander. Put the blank back in the jig then rotate 90 degrees and repeat cutting/glueing until finished.
I make the inserts the same thickness as the saw blade.
I have a duplicate rig for the band saw.
I make the inserts the same thickness as the saw blade.
I have a duplicate rig for the band saw.

