• Thanks for visiting The Penturners Forum today.

    There are many features and resources that currently you are unable to see or access, either because you're not yet registered, or if you're already registered, because you're not logged in.

    To gain full access to the forum, please log in or register now. Registration is completely free, it only takes a few seconds, and you can join our well established community of like-minded pen makers.

Pushed to the limits

Grump

Grand Master
Joined
Aug 17, 2013
Posts
10,510
Location
Stevenage
First Name
Brian
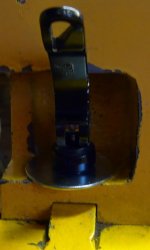
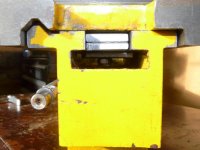
The new part I ordered arrived in super fast time.
What a service I thought to myself, took the package and coffee to shed and this is how it came out of the wrapper.

P1100248.jpg

Where's my Rambo outfit? Someone is gonna get hurt init?
 

Grump

Grand Master
Joined
Aug 17, 2013
Posts
10,510
Location
Stevenage
First Name
Brian
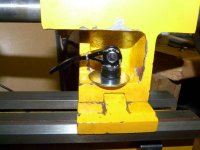
I won't be ordering another one, my home made temporary mod is working better than these crappy Chinese things.

I have thoughts of putting some sacrificial wear shims in there instead, it does mean manual oiling and regular wear checks but should keep it far more sturdy and accurate.
Also doing away with the back gaurd and base tray and raising it on blocks to gain easy access to underneath the moshene.
 

Grump

Grand Master
Joined
Aug 17, 2013
Posts
10,510
Location
Stevenage
First Name
Brian
Sod them silly weak strips that need forever adjusting, I done away with them totally init?
A simple mod means it is sturdier than before with no play and now moving beautifully, better still it is adjusted from above without having to tip it up every few minutes.
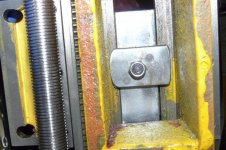
This was my hash up to see if the idea worked and it works so well it is staying on there.

I removed the slide to make some more slide plates from my diminishing weather strip and then thought this is a stupid idea surely there is a better way.
How about using the center track like the tailstock does init?
A couple of plates one with a slotted hole and a another across the bottom to hold it all together I drilled and tapped, simples init?

P1100250.jpg

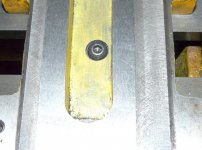
Buried the screw head so the cross slide thread ain't interfered with, a squirt of motion lotion and away it goes dunnit?
Half a dozen lengths of the track and readjust now it's scraped the paint off it is bloody lovely.

P1100253.jpg

Yes I could have milled a purpose made part and yes it could look prettier but hey who cares this works it was quick and cost bugger all.
A bit of 25mm flat bar ground to 18mm cos that is what was in stock, a drill for the holes and a bolt with a nylock nut job done.

P1100251.jpg
 

Grump

Grand Master
Joined
Aug 17, 2013
Posts
10,510
Location
Stevenage
First Name
Brian
I would love to come visit you mate, maybe one day aye?

I have put this mod through its paces this afternoon and I am very pleased with it, dunno why they don't make em like this.
No more messing about underneath the thing to keep it adjusted, no more lead screw on and off to get at the strips.
One nut adjustment in seconds instead of hours of pissing about.
 

Lons

Fellow
Joined
Dec 17, 2013
Posts
4,758
Location
Northumberland
First Name
Bob
Simplest mods are the best Brian but you have to have the right kind of mind to find a work around. I often go to sleep on it and wake up having worked something out, not always the best solution of course.:thinks:

My tablesaw problem is a pita. It's a SIP 01332 cast iron 10" I bought new around 12 years ago and it's been only lightly used. I guess that's the problem as the worm wheel drive on the rise and fall mech had some rust and stuck so the teeth failed. Not visible looking at it and I regularly lubricated all the moving parts. I've heard of it happening before so it's a weak point I suppose. Anyhow I ordered up the wheel and the worm rod it engages with after first speaking to SIP and then their agent World of Power, fitted the parts which are a bitch to get at only to find that they don't work. The rod had changed shape but fitted ok though the original handle now doesn't fit but the new worm wheel slips on it. Took it all off again and calipers tell me the new wheel is 1.7mm smaller than the original. No adjustment is possible!

More words with SIP technical, who were very helpful tbh but as the saw is older than 10 years I'm stuffed. Only solution I can come up with is to slightly elongate the 2 holes through the cast iron support bracket to get it closer but then will need to shim under the studs or they'll just slip back over time. Cant move the worm wheel or put larger bolts in as the gear is threaded.

To get at all of this I'll have to take the cast iron tables off so I ain't happy:sob: great saw otherwise but 12 years of very light use just isn't good enough imo.
 

Grump

Grand Master
Joined
Aug 17, 2013
Posts
10,510
Location
Stevenage
First Name
Brian
While I am messing with this little lathe I had thoughts of modding the tailstock.

I have seen many cam lever mods on the net that I am sure will work but all involve drilling through and levering from the back.
I didn't want to get too involved as the nut that usually is in there doesn't bother me that much, it rarely gives me any problems undoing it or tightening it and it just works.

I did have thoughts that on my bike the saddle clamp has one of these eccentric levers, I wonder init?
This set me off on a tangent and things started to get out of hand when the stud was too short enuf to get a nut on underneath.
I now liked the idea of having a little lever on the front side, so dived into my allsorts bin and looked at fitting air rams and hydraulics before coming down to earth and thinking all I need to try this idea is a longer thread init?

The bike now has a wheel missing where I nicked the skewer and cut it down to fit, albeit a thinner stem and it rattles around in the hole (hence the penny washer) it works.
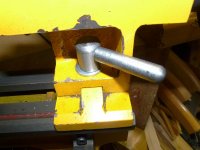
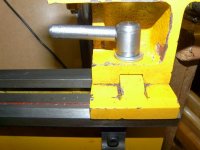
This little lever holds the tailstock in place and tucks neatly out of the way, very tidy and simple init?
P1100254 (2).jpg P1100258.jpg

P1100259.jpg P1100261.jpg

But not as firmly as I would like or need, when the quill is extended it pushes the tailstock backwards, I am in two minds as to whether to:
Make my own eccentric lever with a more robust spindle and clamp.
Add a stop clamp to the back of the tailstock.
Put the original clamp back on and forget the whole silly idea init?

Let's have a vote, what do you reckon?
 

Grump

Grand Master
Joined
Aug 17, 2013
Posts
10,510
Location
Stevenage
First Name
Brian
I decided to put the original bracket back in, anything else was to much messing about.
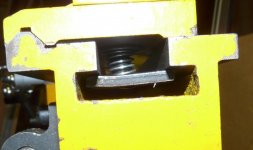
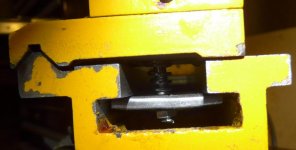
I did adapt it somewhat by putting a spring on the stud to push the bottom plate away on release.

P1100262.jpg

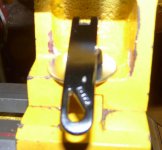
I also made up a lever for the top end which works fantastic and saves all the spanner work, released the tailstock slides smoothly.

P1100264.jpg

It locks up tighter a Jocks wallet and tucks nicely out of the way with little or no effort.

P1100266.jpg

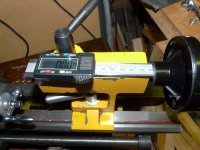
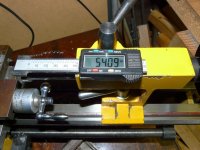
I also had a play with sticking a dro on the top, I had seen this mod and often wondered whether the benefits would be worth sacrificing a decent measuring device for.
At a fiver for a new one I treated myself and used the old un for this, not unhappy with it, it works well and I can see at a a glance how deep my hole is by zeroing it on entry point.
Yes very worthwhile, it is only glued on at the moment so when I get a moment I'll screw it permanently down.

P1100268.jpg P1100270.jpg
 

Grump

Grand Master
Joined
Aug 17, 2013
Posts
10,510
Location
Stevenage
First Name
Brian
Thanks Ted it has been a goodly little play with the moshene which is now, in my opinion better than it was when new.
It certainly now spins well without chattering and all set up square by a dial gauge so I now it runs true for the time being but like all machines need regular maintenance and reset as they wear or get put out under strain init?
 
Top