-
Thanks for visiting The Penturners Forum today.
There are many features and resources that currently you are unable to see or access, either because you're not yet registered, or if you're already registered, because you're not logged in.
To gain full access to the forum, please log in or register now. Registration is completely free, it only takes a few seconds, and you can join our well established community of like-minded pen makers.
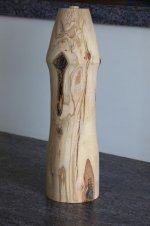
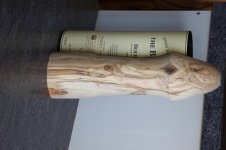
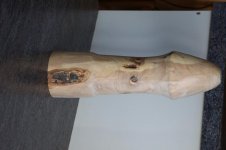
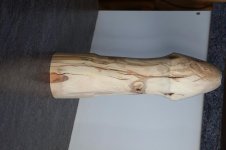
Table lamp W,I,P.
- Thread starter Themackay
- Start date
Don't think it's going to dry out much more Alan, but it won't hurt to give it a couple of days to stabilise anyway.
Keep the pictures coming as you progress Alan I look forward to seeing the finished item
 Vic
Vic
 Vic
Vic
I consider 15% to be dry. The ambient moisture content in my workshop is about 15%, so even if I come by a piece of wood that is drier to start with, it will gain moisture to 15%. I doubt your cracks will move any more unless you bring it indoor unsealed and stand it near a radiator. but when you take it out to your workshop again they will close up.
If it were mine I'd turn it, give it the infill treatment if that's the route you've chosen, seal it, finish it, then bring it indoors to a cool room for a while and you'll probably be OK.
If it were mine I'd turn it, give it the infill treatment if that's the route you've chosen, seal it, finish it, then bring it indoors to a cool room for a while and you'll probably be OK.
bluntchisel
Registered
That piece has a great future - take as long as you need, it'll be worth it!
Bob.
Bob.
Are you sure it is not a wall light being on its side
Will watch as you go I have made a couple of lights, not for sale could not do with the hassle. I agree about taking it indoors as that will be its final resting place once complete, let is split now rather than when finished.

Will watch as you go I have made a couple of lights, not for sale could not do with the hassle. I agree about taking it indoors as that will be its final resting place once complete, let is split now rather than when finished.
wm460
Grand Master
- Joined
- Mar 16, 2013
- Posts
- 23,133
- First Name
- Mark
Look forwards to seeing the finished resulst.

My thinking at the moment was just to take the diameter down a little bit more towards the top I would like to leave the bits of bark that are left so cant take much off if I want to do that open to advice/suggestions
I would probably open the splits up with a rotary burr to look more like the bark inclusion already in the timber & scorch it black, wire brush it then seal with s/sealer. After I'd done this then I would finish turning it to remove any surface scorch marks.
I look forward to the pics of your WIP.
I look forward to the pics of your WIP.
With that grain Alan its going to look good whatever you decide
billyb_imp
Registered
Looks good Alan, nice shape, looking forward to seeing progress 


I would probably open the splits up with a rotary burr to look more like the bark inclusion already in the timber & scorch it black, wire brush it then seal with s/sealer. After I'd done this then I would finish turning it to remove any surface scorch marks.
I look forward to the pics of your WIP.
I think I will go down this route


