• Thanks for visiting The Penturners Forum today.

    There are many features and resources that currently you are unable to see or access, either because you're not yet registered, or if you're already registered, because you're not logged in.

    To gain full access to the forum, please log in or register now. Registration is completely free, it only takes a few seconds, and you can join our well established community of like-minded pen makers.

Making thin 'veneer' slices accurately, and Pen Boxes

MrJoshua

Full Member
Joined
Mar 24, 2015
Posts
100
Location
United Kingdom
First Name
Jim
Afternoon all

I've a couple of questions relating to aspects of my penmaking, separate to the pens themselves really, and hope this is the right place to ask!

1) Veneers - I like doing celtic bands but am struggling to get consistent veneer type pieces to insert into the bandsaw cut. The kerf of the cut is 1.2-1.3mm, so I have just tried the lazy option and looked on ebay for "1.2mm veneer" but come up blank. Any time I try to cut suitable pieces they're rarely of a consistent thickness regardless of how I try to cut them (ie what kind of saw/power saw I use).
What's the easiest method to get thin accurate slices like this consistently in you guys' experience? I've tried one attempt at glueing two thin sheets of different 0.6mm veneers together to make a thicker layer to slot in but it didn't turn out well for some reason. I think that was more to do with the cut itself being bad on that occasion rather than the insert.

2) Pen boxes - I want to provide my pens in wooden boxes, and was going to buy them in some shape or form as cheap as I could, but haven't found anything that looks ok but doesn't add quite a bit to the price, as anything cheap seems to (understandably) be poor quality, which spoils the overall impression. So kind of two questions here, if you buy wooden pen boxes yourself, can you recommend a supplier of cheap but ok quality boxes, OR, is there a box design where it's very simple & quick to make myself, or where I could do a load of them in one go relatively easily? I've got a table saw (cheap, nasty one), and router/router table (I've very little practical experience using a router though), chop mitre saw, bench belt sander, thicknesser, bandsaw etc, so most power tools I'd likely need I think.

Thanks folks - appreciate any useful input on these two areas!
 

Lons

Fellow
Joined
Dec 17, 2013
Posts
4,758
Location
Northumberland
First Name
Bob
You should be able to cut thin veneer on a bandsaw, tablesaw, mitre saw or hand "nobex" type mitre saw. I can on mine, then use ds tape to hold down while you sand lightly, You only need small pieces so not too difficult with a little trial and error. Jim is an expert so no doubt he'll be able to point you in the right direction.

You can find plenty of 1.5mm thick veneers if you look for some of the marquetry suppliers on line and they will come sanded, look for saw cut or inlay product if I remember correctly.
Also gluing std 0.6 together isn't difficult. Wet the veneers and press them to get rid of any buckled areas, a steam iron can help sometimes if you're in a hurry, use pva glue and clamp really tight. I'm lucky to have an old letter press but any method will do for small bits.

Can't help with the boxes but Timberbits have some plans on their website.
 

MrJoshua

Full Member
Joined
Mar 24, 2015
Posts
100
Location
United Kingdom
First Name
Jim
Thanks for the reply and info, I suppose it must be just practise and technique then for the veneers but I'll search for ones online like you've mentioned so I've got some to use while I get myself better at doing these.
I was actually cutting slices relatively well from a rolling pin of all things, but I forget which saw I did it with, maybe the tablesaw.
The bandsaw, despite replacing the guides with bearings and fitting a much deeper blade etc, still doesn't quite cut straight, so I can see frustration down that route. One thing that might do it consistently and with little effort would be with my metal cutting bandsaw (i.e. the type with an arm that drops/cuts under its own weight.

The blade isn't the right thing for wood but I think I have one that might do, so I might try that.

I will have a look on timberbits website thanks - not heard of them but will go look.

Appreciate the input thanks! :)
 

Doug

Loquacious
Executive Member
Joined
Aug 25, 2013
Posts
6,724
Location
In the wood shop
First Name
Take a guess
You just need a thicknessing jig Jim, I just use a couple of blocks of wood, a clamp & a plane blade, there are plenty of examples on the Internet.
This one was the first to pop up on a Google image search which should give you a good idea.

image.jpg

Just cut your veneer slightly over sized & keep moving the blade in a little every time you've pulled the veneer through until it's the thickness you want.

Hope tha helps.
 

Dalboy

Executive Member
Joined
Mar 20, 2014
Posts
7,720
Location
Kent
First Name
Derek
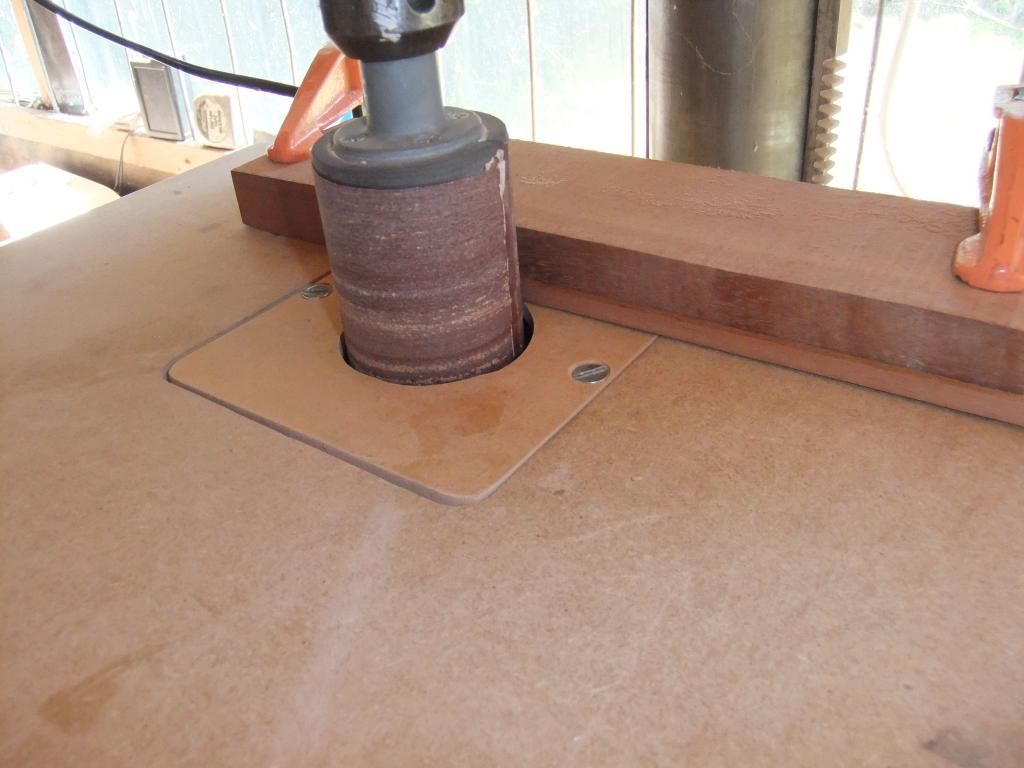
Cut them on a bandsaw a fraction over then sand by putting a drum sander in a drill press. I did some this way the only picture of a very similar set up that I can find is when I wanted some small stock for a car model I made.

DSCF1954_zps1c55305e.jpg
.

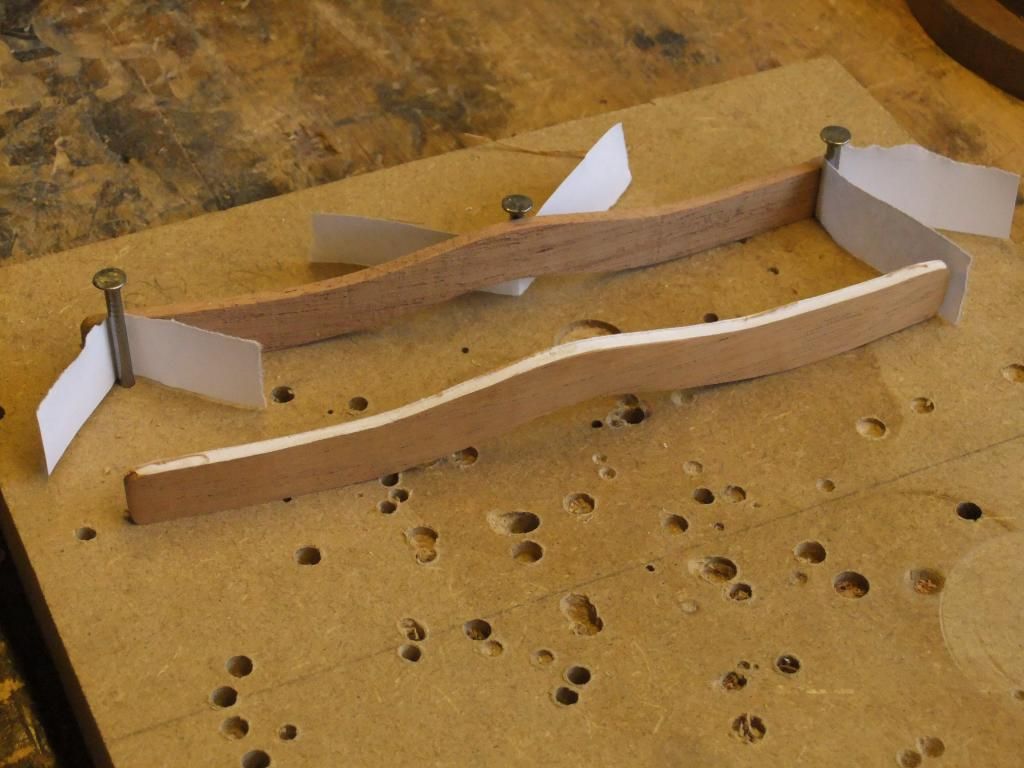
The bumpers where made this way

2013-07-21_17-13-50_zpsb4c2985b.jpg


As you can see from the model there are a few bits that needed to be sanded in this way.

DSCF2131_zps96158f91.jpg
 

Doug

Loquacious
Executive Member
Joined
Aug 25, 2013
Posts
6,724
Location
In the wood shop
First Name
Take a guess
I've used Derek's way before but found it can be a little tricky when you get under 1.5mm in thickness, but worth a try if you have the gear.
 

MrJoshua

Full Member
Joined
Mar 24, 2015
Posts
100
Location
United Kingdom
First Name
Jim
Thanks for the suggestions and the pics chaps - gives me some good pointers, cheers.

That car looks great by the way!!
 

Jim

Grand Master
Joined
Oct 19, 2011
Posts
15,617
All i use is the bandsaw, i have a piece of wood with a test cut from the bandsaw, get a piece of wood from the bin, start cutting the veneers using the marker on the guide rail set to just over 1mm (My Kerf Size) try it in the test slot and adjust till i get my fit. I then use the wood i want for the veneers. Just a little tip. Once you get this set up correctly have a look around your workshop at other woods you have and cut some veneers from this, it saves so much time when you next need inlays for the Celt Crosses. Just to add that i never have to use any sandpaper when making veneers this way ..

If you have run off with the bandsaw you will need to make the adjustments needed, there are quite a few good videos on youtube that can help you with this.
 

MrJoshua

Full Member
Joined
Mar 24, 2015
Posts
100
Location
United Kingdom
First Name
Jim
Ok grand, cheers Jim.

Yeah I've watched a lot of the videos on youtube for bandsaw stuff but I still have it wanting to twist to one side. Obviously the lower down the guide is the less it does it as there is less gap where it can twist. It's way better than it was after I modified it all but still does it to an extent.
 

Jim

Grand Master
Joined
Oct 19, 2011
Posts
15,617
The thing is Jim, if you have run off you will never be able to get the correct thickness over a lengthy cut? If you have the set up correct try a new blade .. :thinks:
 

Neil

Fellow
Joined
May 21, 2013
Posts
3,137
Location
Hitchin, Hertfordshire
First Name
Neil
Ok grand, cheers Jim.

Yeah I've watched a lot of the videos on youtube for bandsaw stuff but I still have it wanting to twist to one side. Obviously the lower down the guide is the less it does it as there is less gap where it can twist. It's way better than it was after I modified it all but still does it to an extent.

Jim,

What bandsaw have you got?
 

Lons

Fellow
Joined
Dec 17, 2013
Posts
4,758
Location
Northumberland
First Name
Bob
The thing is Jim, if you have run off you will never be able to get the correct thickness over a lengthy cut? If you have the set up correct try a new blade .. :thinks:

What Jim said!

Best thing you will ever do is buy a new blade from Tuffsaws. If you need advice, just give him a ring and he'll sort you out. His blades are superb and will transform even a cheap bandsaws, they aren't overpriced and usually delivered quickly. (I don't have any connection btw, just a satisfied customer).

Next you need to spend a little time setting up your guide so that cuts are parallel to the blade some are simple others less so, my Startrite 352 has to be shimmed for example whilst yours might be a couple of bolts. Here's a simple video but note that you should check your setup whenever you change blades. This is a necessary maintenance routine as every bandsaw will drift, doesn't matter what you buy, it's the nature of the beast.https://www.youtube.com/watch?v=IZThUPOr_Ug
 

MrJoshua

Full Member
Joined
Mar 24, 2015
Posts
100
Location
United Kingdom
First Name
Jim
Doesn't need to be lengthy for the purpose of this though. I mean the pieces I need would be something like an inch square, perhaps a bit longer at most, so it doesn't have to do big pieces.
I converted the guides to roller bearings above and below the table, got everything really square, got the blade tracking nicely, and when I fitted a new blade it was a huge improvement overall between all the changes but still does it a bit.
Someone told me if you've ever cut a curve with a bandsaw blade it'll never track straight again so not sure how true that is, but I had done a lot with the previous blade. This one is thicker and deeper though so less prone to twisting.

Gonna go and have a play with it I think and using the modified mitre guide I did, or the fence, I'll see if I can get suitable pieces with a bit of messing.
 

MrJoshua

Full Member
Joined
Mar 24, 2015
Posts
100
Location
United Kingdom
First Name
Jim
Thanks for the heads up on those blades. Might buy one to try.

It is a cheap saw alright though. It's a B&Q 'power' branded one I got from them for £50 in a sale, but the same machine is also sold as draper and all sorts of other common brands.
I have done a load of setup after watching videos and fitting the new better blade but could be something still not quite right I guess. Wondering if even insufficient tension could be causing it but don't want to overtighten it.
 

Neil

Fellow
Joined
May 21, 2013
Posts
3,137
Location
Hitchin, Hertfordshire
First Name
Neil
Thanks for the heads up on those blades. Might buy one to try.

It is a cheap saw alright though. It's a B&Q 'power' branded one I got from them for £50 in a sale, but the same machine is also sold as draper and all sorts of other common brands.
I have done a load of setup after watching videos and fitting the new better blade but could be something still not quite right I guess. Wondering if even insufficient tension could be causing it but don't want to overtighten it.

Jim,

If its the bandsaw I think it is, its my opinion that there is a cavenous void between your expectation and its capability. On the tension issue, its about right if you can deflect the blade with your finger about a quarter of a centimetre, but just to satisfy any job hungry H and S inspectors please ensure that the machine is switched off when you try this!!! Unplug at the mains, isolate the RCB and tell the electricity board and you should be safe if your wearing rubber soles.

Cutting veneers with that spec is not going to work and cutting anything denser than pine is going to be an ordeal. Is it this one? Draper Hobby Bandsaw 230 Volt 09681 - £130.99 - Ray Grahams DIY Store
 

Grump

Grand Master
Joined
Aug 17, 2013
Posts
10,510
Location
Stevenage
First Name
Brian
That is the one Neil, we have been through all this before with Jim I remember his bandsaw issue from the last episode.
I loved my little benchtop saw and never had these problems with it, in fact I still miss it for these sort of jobs.
 

MrJoshua

Full Member
Joined
Mar 24, 2015
Posts
100
Location
United Kingdom
First Name
Jim
Yes Neil that's the offending item, but make no mistake, I have very low expectations of this machine, so not quite void you're quite imagining! :thumbs:

Anyway, from one end of the table to the other the deflection currently is 12.5mm. I could work round this by setting the fence at the matching angle as per the video above, but unfortunately this only goes on somewhere between almost straight, straight, and almost straight on the opposite side. It cannot be locked down on an angle like that as it just pulls itself towards straight. I'd have to add a wedge shape that corresponds to the deviation of the blade in order to make it useful, and bolt it onto the fence. Or possibly see if I can modify it to be able to go at any angle. Not sure it'd be very easy though. One end of it (opposite the lock handle) could be given a radius where it pulls against the table but the handle end has a piece half and inch or so each side that are cast, and ensure it sits more or less square. I think to get round it I'd have to get rid of those and add a central curved clamping point somehow.

Another issue with it is that it's just plain sh*t! The fence once locked down is locked in place, but not properly secure against the table so it can rock/tilt, making it mostly a waste of space. I've tried modifying it to correct this but so far it hasn't worked. I might add some sort of shims beneath it to try and prevent it.

Here's the culprit and it's 'deviant' factor though:
A770C743-9BC7-4097-B19C-68EDB2BA965C_zpspty8zrbv.jpg
 

MrJoshua

Full Member
Joined
Mar 24, 2015
Posts
100
Location
United Kingdom
First Name
Jim
Here's the clamping end, so I might look at hacking this up to clamp in the middle so I can set the angle instead of it trying to square itself.
4C6DD3EC-AB87-4315-BC49-6E325680CD69_zpsyp3slxee.jpg
 

Lons

Fellow
Joined
Dec 17, 2013
Posts
4,758
Location
Northumberland
First Name
Bob
Hi Jim

Never going to make a silk purse out of a pigs ear but you could improve the fence.
I would fit a false fence of ply or MDF and just shim out the back to accommodate the discrepancy. Use bolts countersunk into the MDF, through the original fence which will give easy adjustment.
 
Warning! This thread has not had any replies for over a year. You are welcome to post a reply here, but it might be better to start a new thread (and maybe include a link to this one if you need to).
Top